
This is a long blog post. I included many details that were part of the decision process at each phase. If you are looking for a concise tech explainer, try this post instead.
I recently published a book of computer generated photographs and wanted to also generate the introductory text for it. I looked around for an online text generator that lived up to the AI hype, but they were mostly academic or limited demos. I also wanted a tool that would yield language specific to art and culture. It didn’t exist, so I built it.
My first impulse was to make use of an NVIDIA Jetson Nano that I had bought to do GAN video production. I had spent a few months trying to get that up and running but got frustrated with dependency hell. I pulled it back out and started from scratch using recent library updates from NVIDIA.
Long story short; it was a failure. Getting that little GPU machine running with modern PyTorch and Tensorflow was a huge ordeal and it is just too under-powered. Specifically, 4gb of RAM isn’t enough to load even basic models for manipulation. I was asking much more from it than the design intent, but was hoping it was hackable. Nope.
FWIW, I did come up with a Gist that got it very close to a ML configuration. Others may find it valuable if lost in that rabbit hole.
The breakthrough came while I was digging around the community for Huggingface.co tutorials that focused on deploying language models. Somebody recommended a Google Collab notebook by Max Woolf that simplified the training process. I discovered that Google Collab is not only a free service, it allows use of attached GPU contexts for use in scripts. That’s a big deal because online GPU resources can be expensive and complicated to set up.
In learning to use that notebook I realized I needed a large dataset to train the GPT-2 language model in the kind of writing I wanted it to produce. A few years ago I had bought a subscription to ArtForum magazine in order to read through the archives. I was, and still am, interested in the art criticism of the 60s and 70s because so much of it came from disciplined and strong voices. Art criticism was still a big deal back then and taken very seriously.
I went back to the ArtForum website and found the archives were complete back to 1963 and presented with a very consistent template system. Some basic web scraping could yield the data I needed.
Scraping with Python into an SQLite3 database
The first thing I did was pay for access to the archive. It was worth the price and I got a subscription to the magazine itself. Everything I did after that was as a logged in user, so nothing too sneaky here.
I used Python with the Requests and Beautiful Soup libraries to craft the scraping code. There are many tutorials for web scraping out there, so I won’t get too detailed here.
I realized there might be circuit breaker and automated filtering on the server, so I took steps to avoid hitting those. First I rotated the User Agent headers to avoid fingerprinting and I also used a VPN proxy to request from different IP addresses. Additionally, I put a random delay ~1 second between requests so it didn’t hammer the server. That was probably more generous that it needed to be, but I wanted the script to run unattended so I erred on the side of caution. There was no real hurry.
headers_list = [
    # iphone
     {
        "Accept": "text/html,application/xhtml+xml,application/xml;q=0.9,*/*;q=0.8",
        "Accept-Language": "en-us",
        "Connection": "keep-alive",
        "Accept-Encoding": "br, gzip, deflate",
        "User-Agent": "Mozilla/5.0 (iPhone; CPU iPhone OS 13_1_3 like Mac OS X) AppleWebKit/605.1.15 (KHTML, like Gecko) Version/13.0.1 Mobile/15E148 Safari/604.1"
    },
    # ipad
    {
        "Accept": "text/html,application/xhtml+xml,application/xml;q=0.9,*/*;q=0.8",
        "Accept-Language": "en-us",
        "Connection": "keep-alive",
        "Accept-Encoding": "br, gzip, deflate",
        "User-Agent": "Mozilla/5.0 (Macintosh; Intel Mac OS X 10_15) AppleWebKit/605.1.15 (KHTML, like Gecko) Version/13.0.1 Safari/605.1.15"
    },
    # mac chrome
    {
        "Accept": "text/html,application/xhtml+xml,application/xml;q=0.9,*/*;q=0.8",
        "Accept-Language": "en-us",
        "Connection": "keep-alive",
        "Accept-Encoding": "br, gzip, deflate",
        "User-Agent": "Mozilla/5.0 (Macintosh; Intel Mac OS X 10_15) AppleWebKit/537.36 (KHTML, like Gecko) Chrome/78.0.3904.70 Safari/537.36"
    },
    # mac firefox
    {
        "Accept": "text/html,application/xhtml+xml,application/xml;q=0.9,*/*;q=0.8",
        "Accept-Language": "en-us",
        "Connection": "keep-alive",
        "Accept-Encoding": "br, gzip, deflate",
        "User-Agent": "Mozilla/5.0 (Macintosh; Intel Mac OS X 10.15; rv:70.0) Gecko/20100101 Firefox/70.0"
    }
]
This was a 2 part process. The first was a script that collected all the links in the archive from the archive landing page, grouped by decade. The larger part was next, requesting all 21,304 links collected and isolating the text within.
for x in range(1, quantity):
        if (x == 1) or ((x % 10) == 0):
            proxy = random.choice(proxies)
            headers = random.choice(headers_list)
            sesh.headers = headers
        sleep(random.uniform(.5, 1.5))
        URL = links[x][0]
        page = sesh.get(URL, proxies=proxy)
        soup = BeautifulSoup(page.content, 'html.parser')
        h1 = soup.find_all('h1', class_='reviews__h1')
        body = soup.find_all('section', class_='review__content')
        date = URL[39:43]
        title = " ".join(str(h1[0].text).split())
        text = " ".join(str(body[0].text).split())
        text = text.replace(u"\u2018", "").replace(u"\u2019", "").replace(u"\u201c","").replace(u"\u201d", "")
        try:
            cursor.execute("INSERT INTO reviews(date,title,text) VALUES (?,?,?)", (date,title,text))
        except sqlite3.Error as error:
            print("Failed to insert", error)
Once all the reviews were collected, I ran some cleaning queries and regex to get rid of punctuation. Then it was a simple export to produce a CSV file from the database.
Training the GPT-2 model

Now that I had a large collection of language examples to work with, it was time to feed the language model. This stage requires the most compute power out of any part of the project. It also makes use of specialized libraries that run most efficiently with a GPU. On a typical desktop computer system, the GPU is usually the video card and comes from a variety of vendors.
Last decade, the rise of cryptocurrency mining absorbed large stocks of GPU hardware. People built huge GPU farms to generate this new virtual gold. That drove innovation and research capital in the GPU manufacturing market. Modern machine learning and neural network implementation reap the benefits of that fast progress.
In academic and corporate environments, custom onsite infrastructure is an option. For smaller businesses, startups, and independent developers, that can be cost prohibitive. What has evolved is a new GPU provisioning economy. In some ways it’s a throwback to the mainframe timeshare ecosystems of the 70s. Full circle.
For this project, my budget was zero. GPU attached server instances come at a premium starting at $.50/hr. ($360 a month). So, I looked into all kinds of free tiers and promotional servers. I even asked around at Grey Area hoping some alpha geek had her own GPU cluster she was willing to share. No dice.
What I did find was a Tensorflow training tutorial using Google Colab, which offers FREE GPU compute time as part of the service. I didn’t know about Colab, but I had heard plenty about Jupyter notebooks from former co-workers. They are sharable research notebooks that can run code. Jupyter depends on the underlying capabilities of the host machine. Google has vast resources available, so their notebook service include GPU capability.
The tutorial is straightforward and easy. After months of wrestling the Jetson Nano into a stalemate, watching Collab load Tensorflow and connect to my CSV so fast was shocking. I successfully had simple training working in less than an hour. Generated text was only a few minutes later. I was in business.
There are a few options for the training function and I spent some time researching what they meant and tinkering. The only option that had relevant effect was the number of training steps, with a default of 1000.
sess = gpt2.start_tf_sess()

gpt2.finetune(sess,
              dataset=file_name,
              model_name='355M',
              steps=10000,
              restore_from='latest',
              run_name='runmed',
              print_every=10,
              sample_every=200,
              save_every=500,
              overwrite=True
              )
I had interesting results at 200 training steps, good results at 1000, better at 5000 steps. I took that to mean more is always better, which is not true. I ended up training for 20000 steps and that took two nights of 6 hour training sessions. Based on the results, I think I’m getting the best it is capable of and more training wouldn’t help. Besides, I have a suspicion that I over-trained it and now have overfitting.
Something I was very fortunate with but didn’t realize until later was the length of the original reviews. They are fairly consistent in length and structure. By structure I mean paragraph length and having and opening or closing statement. They are mostly in the third person also.
But it was the length that was key. I hit upon the sweet spot of what GPT-2 can produce with the criteria I had. It’s not short form, but they aren’t novels either. 400-600 words is a good experimental length to work with.
Another benefit of training like this was being able to generate results so soon in the process. It was really helpful to know what kind of output I could expect. The first few prompts were a lot of fun and I was pleasantly surprised to see so many glitches and weirdness. I was excited about sharing it, too. I thought that if more people could experiment without having to deal with any of the tech, they might be inspired to explore it as a creative tool.
Into the wild

Now that I had a trained language model, the challenge of deploying it was next. The Colab notebook was fine for my purposes, but getting this in front of average folks was going to be tricky. Again, I had to confront the issue of compute power.
People have high expectations of online experiences now. Patience and attention spans are short. I wasn’t intending a commercial application, but I knew people would expect something close to what they are given in consumer contexts. That meant real-time or near real-time results.
The Hugging Face crew produced a close to real-time GPT-2 demo called Talk to Transformer that was the inspiration for producing an app for this project. That demo produces text results pretty fast, but limited in length.
I made one last lap around the machine learning and artificial intelligence ecosystem, trying to find a cheap way to deploy a GPU support app. Google offers GPUs for their Compute Engine, Amazon has P3 instances of EC2, Microsoft has Azure NC-series, IBM has GPU virtual servers, and there are a bunch of smaller fish in the AI ocean. Looking through so much marketing material from all of those was mind-numbing. Bottom line: it’s very expensive. A whole industry has taken shape.
I also checked my own personal web host, Digital Ocean, but they don’t offer GPU augmentation yet. But, they do offer high end multi-core environments in traditional configurations. Reflecting back on my struggle with the Jetson Nano, I remembered an option when compiling Tensorflow. There was a flag for --config=cuda that could be omitted, yielding a CPU-only version of Tensorflow.
That matters because Tensorflow is at the core of the training and generation functions and is the main reason I needed a GPU. I knew CPU-only would be way too slow for training, but maybe the generator would be acceptable. To test this out, I decided to spin up a high powered Digital Ocean droplet because I would only pay for the minutes it was up and running without a commitment.
I picked an upgraded droplet and configured and secured the Linux instance. I also installed all kinds of dependencies from my original gist because I found that they were inevitably used by some installer. Then I tried installing Tensorflow using the Python package manager pip. That dutifully downloaded Tensorflow 2 and built it from the resulting wheel. Then I tried to install the gpt-2-simple repository that was used in the Colab tutorial. It complained.
The gpt-2-simple code uses Tensorflow 1.x, not 2. It is not forward compatible either. Multiple arcane exceptions were thrown and my usual whack-a-mole skills couldn’t keep up. Downgrading Tensorflow was required, which meant I couldn’t make use of the pre-built binaries from package managers. My need for a CPU-only version was also an issue. Lastly, Tensorflow 1.x doesn’t work with Python 3.8.2. It requires 3.6.5.
I reset the Linux instance and got ready to compile Tensorflow 1.15 from source. Tensorflow uses a build tool called Bazel and v0.26.1 of the tool is specifically required for these needs. I set up Bazel and cloned the repo. After launching the installer, I thought it was going fine but realized it was going to take a looooong time, so I let it run overnight.
The next day I saw that it had failed with OOM (Out Of Memory) in the middle of the night. My Digital Ocean droplet had 8gb of RAM so I bumped that up to 16gb. Thankfully I didn’t have to rebuild the box. I ran it again overnight and this time it worked. It took around 6 hours on a 6 core instance to build Tensorflow 1.15 CPU-only. I was able to downgrade the droplet afterwards so I didn’t have to pay for the higher tier any more. FWIW, compiling Tensorflow cost me about $1.23.
I then loaded gpt-2-simple, the medium GPT-2 (355M) model, and my checkpoint folder from fine tuning in Google Colab. That forms the main engine of the text generator I ended up with. I was able run some manual Python tests and get generated results in ~90 seconds. Pretty good! I had no idea how long it was going to be when I started down this path. My hunch that a CPU-only approach for generation paid off.
Now I had to build a public facing version of it.
The Flask app

The success of the project so far came from Python code. So, I decided to deploy it also using Python, as a web application. I’ve been building websites for ~20 years and used many different platforms. When I needed to connect to server processes, I usually did it through an API or some kind of PHP bridge code.
In this case I had my own process I needed to expose and then send data. I figured having a Python web server would make things easier. It was definitely easier at the beginning when was experimenting, but as I progressed the code became more modular and what had been easy was a liability. Flask is a Python library used to build web services (mostly websites) and it has a simple built-in web server. I knew plenty about it, but never used it in a public facing project.
One of the first development decisions I made was to split the web app and text generator into separate files. I could have tried threading but there was too much overhead already with Tensorflow and I doubted my ability to correctly configure a balanced multiple process application in a single instance.* I wanted the web app to serve pages regardless of the state of the text generation. I also wanted them to have their own memory pools that the server would manage, not the Python interpreter.
* I did end up using Threading for specific parts of the generator at a later stage of the project.
Every tutorial I found said I should not use the built-in Flask web server in production. I followed that advice and instead used NGINX and registered the main python script as a WSGI service. After I had already researched the configurations of those, I found this nginx.conf generator that would have made things faster and easier.
After securing the server and getting a basic Hello World page to load, I went through the Let’s Encrypt process to get an SSL certificate. I sketched out a skeleton of the site layout and the pages I would need. The core of the site is a form to enter a text prompt, a Flask route to process the form data, and a route and template to deliver the generated results. Much of the rest is UX and window dressing.
A Flask app can be run from anywhere on the server, not necessarily the /html folder as typically found in a PHP based site. In order to understand page requests and deliver relevant results, a Python script is created that describes the overall environment and the routes that will yield a web page. It is a collection of Python functions, one for each route.
@app.route("/")
def index():
    current_url = base_url
    return render_template('index.html', page_title='Art Review Generator', current_url=current_url, copyright_year=today.year)

@app.route("/generate/")
def generate():
    current_url = base_url + "/generate/"
    return render_template('generate.html', page_title='Generate a review', current_url=current_url, copyright_year=today.year)

@app.route("/examples/")
def examples():
    current_url = base_url + "/examples/"
    return render_template('examples.html', page_title='Examples of generated art reviews', current_url=current_url, copyright_year=today.year)
For the actual pages, Flask uses a built-in template engine called Jinja. It is very similar to Twig, which is popular with PHP projects. There are also Python libraries for UI and javascript, but it felt like overkill to grab a bunch of bloatware for this basic site. My CSS and js includes are local and static and limited to what I actually need. There is no inherent template structure in Flask, so I rolled my own with header, footer, utility, and content includes of modular template files.
Python
return render_template('index.html', page_title='Art Review Generator')HTML
<title>{{ page_title }}</title>Based on experience, the effort you put into building out a basic modular approach to templates pays dividends deep into the process. It’s so much easier to manage.
{% include 'header.html' %}
{% include 'navigation.html' %}
	<div class="container">
		<div class="row">
			<div class="col">
				<p>This site generates art reviews</p>
			</div>
		</div>
	</div>
{% include 'footer.html' %}
After building out the basic site pages and navigation, I focused on the form page and submission process. The form itself is simple but does have some javascript to validate fields and constrain the length of entries. I didn’t want people to copy and paste a lot of long text. On submission, the form is sent as POST to a separate route. I didn’t want to use URL parameters that a GET request would enable because it’s less secure and generates errors if all the parameter permutations aren’t sanitized.
The form processing is done within the Flask app, in the function for the submission route. It checks and parses the values, stores the values in a SQLite database row, and then sends a task to the RabbitMQ server.
@app.route("/submission", methods=["POST"])
def submission():
    payload = request.form
    if spam_check:
        email = payload["submission_email"]
        valid_email = is_email(email, check_dns=True)
        if valid_email:
            # collecting form results
            prompt = payload["prompt"]
            # empty checkbox caused error 400 so change parser
            if not request.form.get('update_check'):
                subscribe = 0
            else:
                subscribe = 1
            eccentricity = int(payload["eccentricity"])
            ip = request.environ.get('HTTP_X_REAL_IP', request.remote_addr)
            result = {"email": email, "prompt": prompt, "eccentricity": eccentricity, "subscribe": subscribe, "ip": ip}

            # create database entry
            dConn = sqlite3.connect("XXXXXXXX.db")
            dConn.row_factory = sqlite3.Row
            cur = dConn.cursor()

            # get id of last entry and hash it
            cur.execute("SELECT * FROM xxxxxx ORDER BY rowid DESC LIMIT 1")
            dRes = cur.fetchone()
            id_plus_one = str(int(dRes["uid"]) + 1).encode()
            b.update(id_plus_one)
            urlhsh = b.hexdigest()
            now = str(datetime.now(pytz.timezone('US/Pacific')).strftime("%Y-%m-%d %H:%M:%S"))

            # insert into database
            try:
                cur.execute("INSERT INTO xxxxxx(ip,email,eccentricity,submit_date,prompt,urlhsh,subscribed) VALUES(?,?,?,?,?,?,?)", (ip, email, eccentricity, now, prompt, urlhsh, subscribe))
                logging.debug('Prompt %s submitted %s', urlhsh, now)
            except sqlite3.Error as error:
                logging.exception(error)

            dConn.commit()
            cur.close()
            dConn.close()

            # notify task queue
            rabbit_connection = pika.BlockingConnection(pika.ConnectionParameters(host='localhost'))
            rabbit_channel = rabbit_connection.channel()
            rabbit_channel.queue_declare(queue='task_queue', durable=True)
            rabbit_channel.basic_publish(
                exchange='',
                routing_key='task_queue',
                body=urlhsh,
                properties=pika.BasicProperties(
                    delivery_mode=2,  # make message persistent
                ))
            rabbit_connection.close()

            # confirmation page
            return render_template('submission.html', page_title='Request submitted', result=result, copyright_year=today.year)
        else:
            ed = email + " is not a valid email address"
            return render_template('error.html', page_title='Error', error_description=ed, copyright_year=today.year)
    else:
        return render_template('submission.html', page_title='Request submitted', result="spam", copyright_year=today.year)
Chasing the rabbit
RabbitMQ is a server based message broker that I use to relay data between the submission form and the generator. Although the two scripts are both Python it’s better to have them running separately. There is no magical route between concurrent Python scripts so some sort of data broker is helpful. The first script creates a task and tells RabbitMQ it is ready for processing. The second script checks in with RabbitMQ, finds the task and executes it. It is a middleman between the two scripts.
It does all this very fast, asynchronously, and persistently (in a crash or reboot it remembers the tasks that are queued). Also, it was easy to use. Other options were Redis and Amazon SQS, but I didn’t need the extra overhead or features those offer, or want the dependencies they require.
It was easy to install and I used the default configuration. Specifically I chose to limit connections to localhost for security. That is the default setting, but it can absolutely be set up to allow access from another server. So, I had the option of running my web app on one server and the generator on another. Something to consider when scaling for production or integrating into an existing web property.
sudo apt install rabbitmq
sudo rabbitmq-diagnostics status
Status of node rabbit@xxxxxx ...
Runtime

OS PID: 909
OS: Linux
Uptime (seconds): 433061
Is under maintenance?: false
RabbitMQ version: 3.8.8
Node name: rabbit@xxxxxx
Erlang configuration: Erlang/OTP 23 [erts-11.0.4] [source] [64-bit] [smp:4:4] [ds:4:4:10] [async-threads:64]
Erlang processes: 294 used, 1048576 limit
Scheduler run queue: 1
Cluster heartbeat timeout (net_ticktime): 60
Delivering results
I chose to deliver results with an email notification instead of (near)real-time for a number of reasons. The primary issue was compute time. My best tests were getting results in 93 seconds. That’s with no server load and an ideal environment. If I tried to generate results while people waited on the page, the delay could quickly climb to many minutes or hours. Also, the site itself could hang while chewing on multiple submissions. I don’t have a GPU connected to the server, so everything is going through normal processing cores.
When Facebook first started doing video, the uploading and processing times were much longer than they are now. So, to keep people clicking around on the site they set up notifications for when the video was ready. I took that idea and tried to come up with delayed notifications that didn’t require a login or keeping a tab/window open. That’s very important for mobile users! Nobody is going to sit there holding their phone while this site chews on Tensorflow for 10 minutes.
I also thought of the URL shortener setup where they use random characters to serve as a bookmark for a link. Anybody can use the link and it doesn’t have content or identity signifiers in the URL.
The delivery process was divided into three stages, processing, notification, and presentation.
Processing stage
The main computational engine of the whole project is a python script that checks RabbitMQ for tasks, executes the generating process with Tensorflow, stores the result and sends an email to the user when it is ready.
Checking RabbitMQ for tasks
def on_message(channel, method_frame, header_frame, body, args):
    (connection, threads) = args
    delivery_tag = method_frame.delivery_tag
    t = threading.Thread(target=motor, args=(channel, delivery_tag, header_frame, body))
    t.start()
    threads.append(t)


channel.basic_qos(prefetch_count=1)
threads = []
on_message_callback = functools.partial(on_message, args=(connection, threads))
channel.basic_consume(queue='task_queue', on_message_callback=on_message_callback)

channel.start_consuming()
The reason I have to use threading is because querying RabbitMQ is a blocking process. It’s a very fast and lightweight blocking process, but can absolutely monopolize resources when running. I found that out the hard way because the script kept silently crashing when asking for new tasks at the same time it was using Tensorflow. Trust me, this took a few days of logging and debugging trying to figure out what was causing the generation process to simply disappear without error.
Retrieve prompt from db and start Tensorflow
    logging.debug("Rabbit says %r" % body.decode())

    # get record using rabbitmq msg
    urlhsh = body.decode()
    dConn = sqlite3.connect("XXXXXXXX.db")
    dConn.row_factory = sqlite3.Row
    cur = dConn.cursor()
    try:
        cur.execute("SELECT * FROM xxxxxx WHERE urlhsh = ?", (urlhsh,))
    except sqlite3.Error as error:
        logging.exception(error)
    dRes = cur.fetchone()
    logging.debug("Found %r, processing..." % urlhsh)
    row_id = dRes["uid"]
    temperature = int(dRes["eccentricity"]) * .1

    # the main generation block, graph declaration because threading
    with graph.as_default():
        result = gpt2.generate(
            sess,
            run_name='porridge',
            length=400,
            temperature=temperature,
            prefix=dRes["prompt"],
            truncate="<|endoftext|>",
            top_p=0.9,
            nsamples=5,
            batch_size=5,
            include_prefix=False,
            return_as_list=True,
        )
    result = json.dumps(result)
Because I’m using threading for RabbitMQ, I had to declare a graph for Tensorflow so it had access to the memory reserved for the model.
with graph.as_default():Store generated result and send notification email
    # store generated results in db
    now = str(datetime.now(pytz.timezone('US/Pacific')).strftime("%Y-%m-%d %H:%M:%S"))
    try:
        cur.execute("UPDATE xxxxxx SET gen_date = ?, result = ? WHERE uid = ?", (now, result, row_id))
        logging.debug("Published %s on %s", urlhsh, now)
    except sqlite3.Error as error:
        logging.exception(error)
    dConn.commit()
    dConn.close()

    # send notification email
    prompt = dRes["prompt"]
    submit_date = dRes["submit_date"]
    email_address = dRes["email"]
    link = "https://artreviewgenerator.com/review/" + urlhsh
    if len(dRes["prompt"]) < 50:
        preview_text = prompt
    else:
        preview_text = prompt[:50] + "..."
    email = {
        'subject': 'Your results are ready',
        'from': {'name': 'Joshua Curry', 'email': 'info@artreviewgenerator.com'},
        'to': [
            {'email': email_address}
        ],
        "template": {
            'id': '383338',
            'variables': {
                'preview_text': preview_text,
                'prompt': prompt,
                'submit_date': submit_date,
                'link': link
            }
        },
    }
    rest_email = [{'email': email_address, 'variables': {}}]
    try:
        SPApiProxy.smtp_send_mail_with_template(email)
        logging.debug("Notification sent to " + email_address)
        if int(dRes["subscribed"]) == 1:
           SPApiProxy.add_emails_to_addressbook(SP_maillist, rest_email)
    except Exception:
        logger.error("Problem with SendPulse mail: ", exc_info=True)
I’m using SendPulse for the email service instead of my local SMTP server. There are a couple of good reasons for this. Primarily, I want to use this project to start building an email list of my art and tech projects. So, I chose a service that also has mailing list features in addition to API features. SendPulse operates somewhere between the technical prowess of Twilio and friendly features of MailChimp. Also important is their free tier allows for 12000 transactional emails per month. Most of the other services tend to focus on number of subscribers and the API access is a value add to premium plans. Another thing I liked about them was their verification process for SMTP sending. Avoiding spam and spoofing is seriously considered in their services.
Presentation
Upon receipt of the notification email, users are given a link to see the results that have been generated. If I was designing a commercial service I would have probably chosen to deliver the results in the actual email. It would be more efficient. But, I also wanted people to share the results they get. Having a short url with a permalink easy to copy and paste was important. I also wanted the option of showcasing recent entries. That isn’t turned on now, but I thought it would be interesting to have a gallery in the future. It would also be pretty useful for SEO if I went down that path.
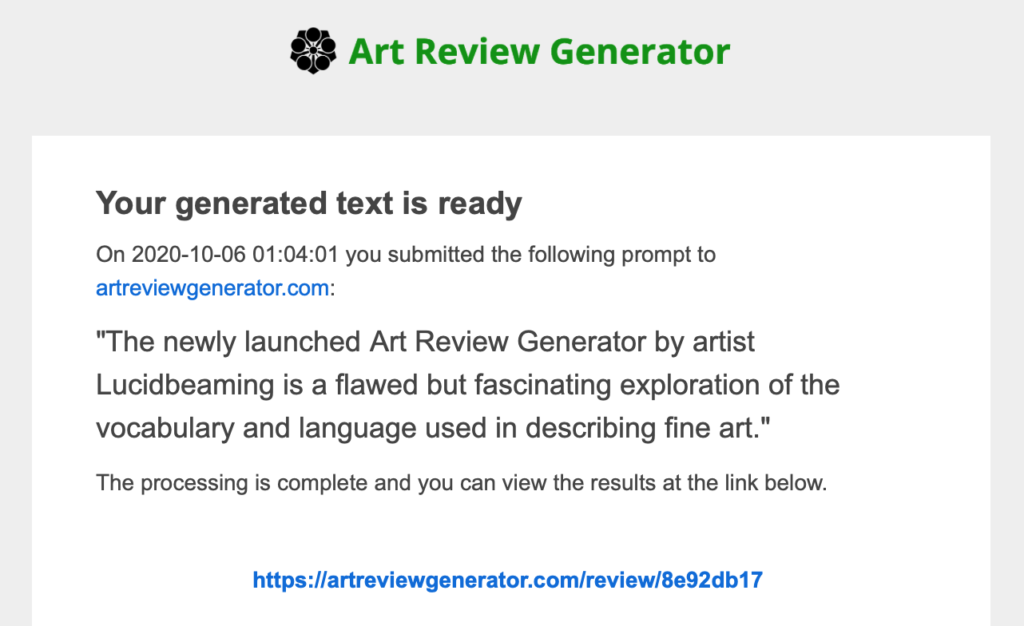
https://artreviewgenerator.com/review/8e92db17
The characters at the end are a hash of the unique id of the SQLite row that was created when the user submission was recorded. Specifically, they are hashed using the Blake2b “message digest” (aka secure hash) with the built-in hashlib library of Python 3. I chose that because the library offers an adjustable character length for that hash type, unlike others that are fixed at long lengths.
from hashlib import blake2b

b = blake2b(digest_size=4)
# get id of last entry and hash it
cur.execute("SELECT * FROM xxxxxx ORDER BY rowid DESC LIMIT 1")
dRes = cur.fetchone()
id_plus_one = str(int(dRes["uid"]) + 1).encode()
b.update(id_plus_one)
urlhsh = b.hexdigest()
When the url is visited, the Flask app loads the page using a simple db retrieval and Jinja template render.
return render_template(
  'review.html',
  page_title=truncated_title,
  prompt=dRes["prompt"],
  review=result_list,
  gen_date=dRes["gen_date"],
  urlhsh=urlhsh,
  current_url=current_url,
  copyright_year=today.year
)
Eventually I would like to offer a gallery of user generated submissions, but I want to gauge participation in the project and get a sense of what people submit. Any time you open up a public website with unmoderated submissions, people can be tempted to submit low value and offensive content.

That is why you see a link beneath the prompt on the results page. I built in a capability for people to report a submission. It’s actually live and immediately blocks the url from loading. So feel free to block your own submissions.
Prologue
This project has been running for a month now without crashing or hitting resource limits. I’m pretty happy with how it turned out, but now have a new mouth to feed by paying for the hosting of this thing.
The actual generator results are interesting to me on a few levels. They reveal intents, biases, and challenges that come from describing our culture at large. They also make interesting mistakes. From my point of view, interesting mistakes are a critical ingredient for creative output.