A few years ago, I built a primitive computer vision music player (Oracle) using analog video and a basic threshold detector with an Arduino. Since then, outboard AI vision modules have gotten much more specialized and powerful. I decided to try an advanced build of Oracle using the new Grove Vision AI Module V2.
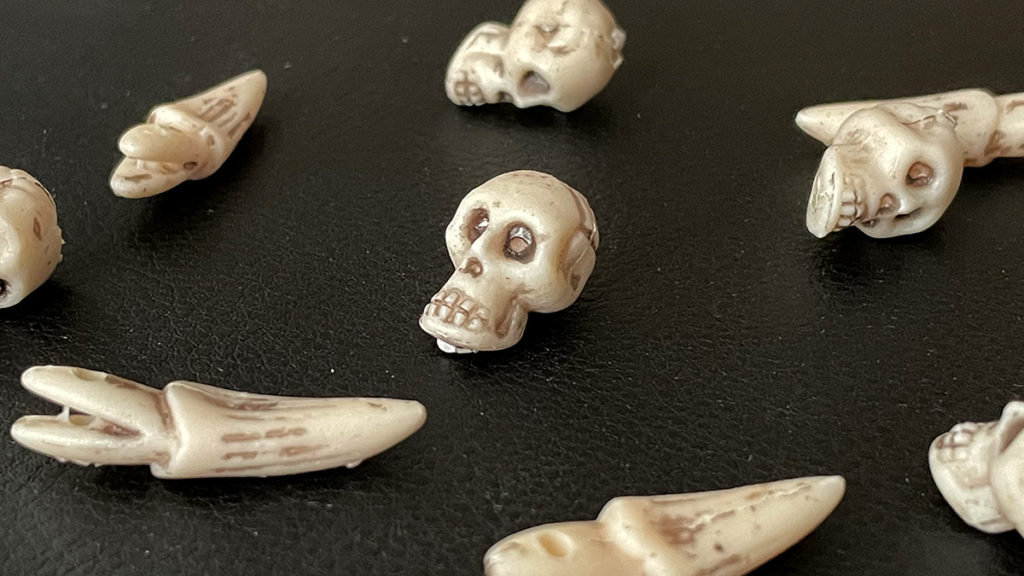
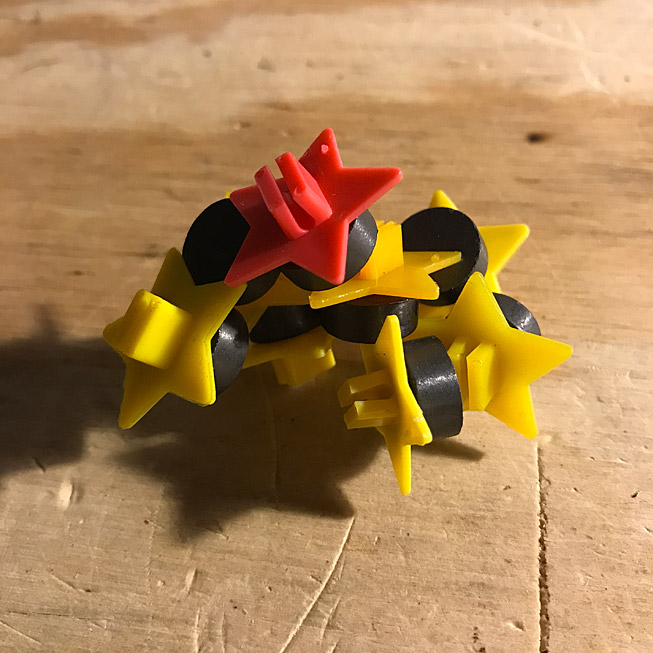
This post describes the approach and build, as well as a few pitfalls to avoid. Seeed sent me one of their boards for free and that was the motivation to try this out. Ultimately, I want to use the lessons learned here to finish a more comprehensive build of Oracle with more capability. This particular project is called Skulls because of the plastic skulls and teeth used for training and inference targeting.
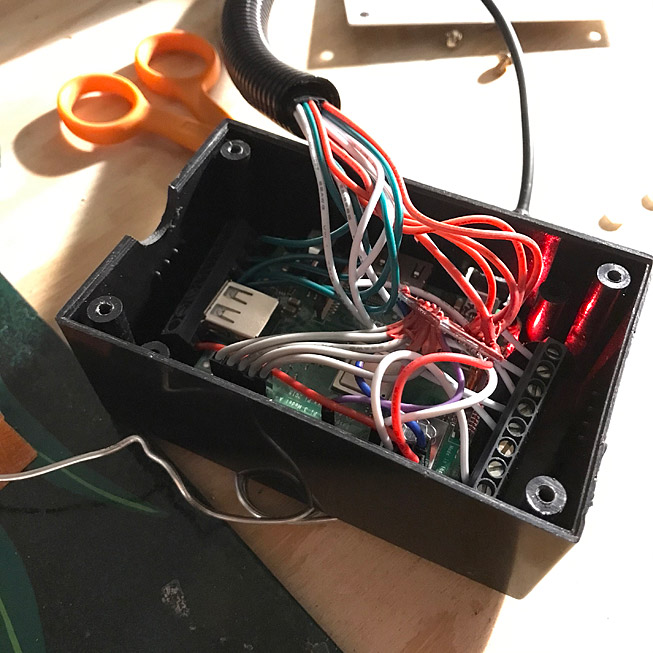
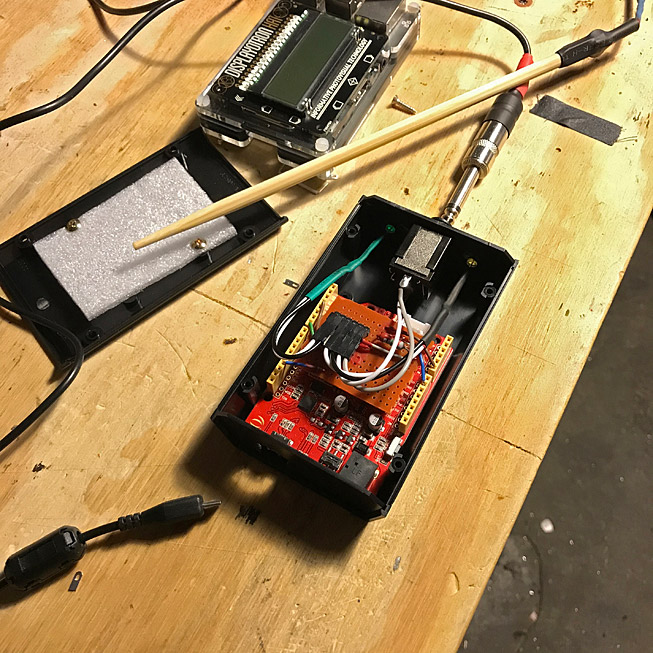
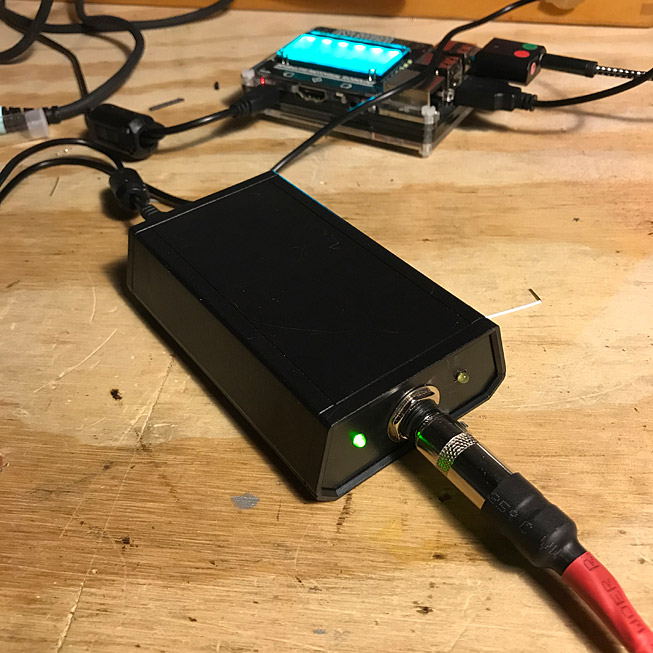
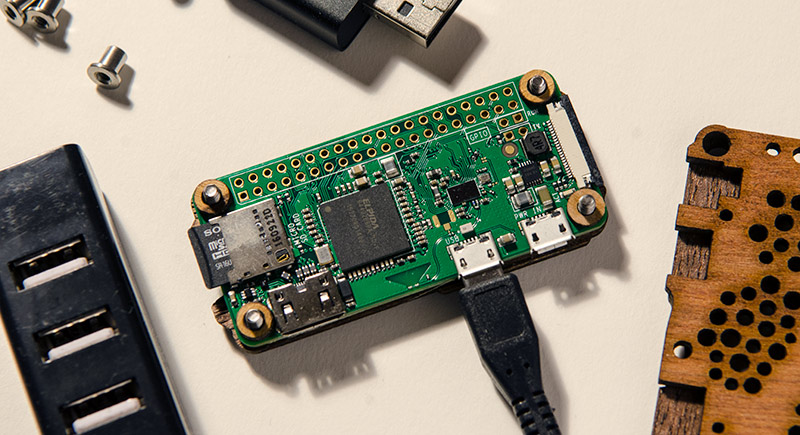
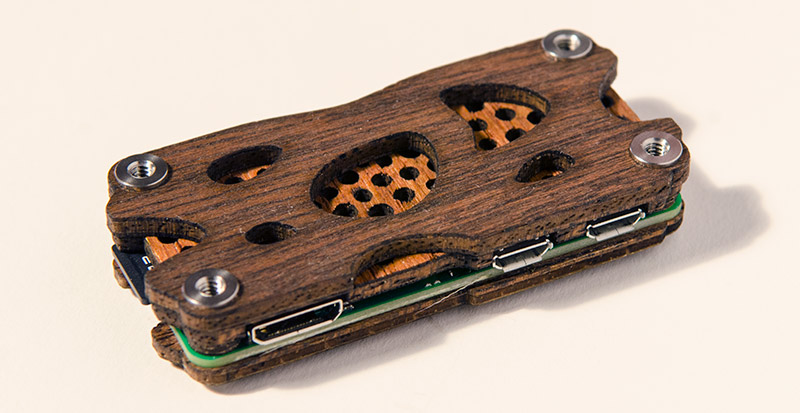
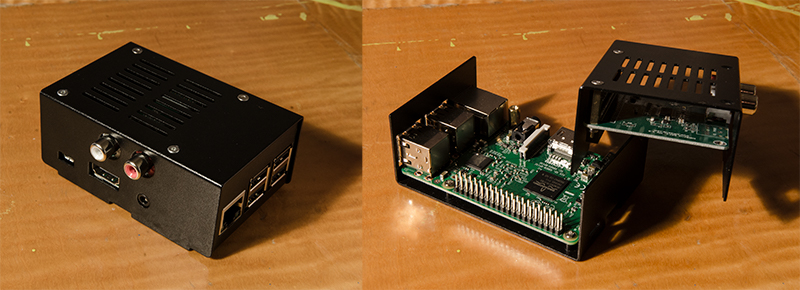
The components are a Grove Vision AI Module V2 (retails for about $26) with an Xiao ESP32 C3 as a controller and interface. The data from the object recognition gets passed to an old Raspberry Pi 3 model A+ using MQTT. The Pi runs Mosquitto as an MQTT broker and client, as well as Fluidsynth to play the resulting music. A generic 8226 board is used as a WiFi access point to connect the two assemblies wirelessly.
What worked
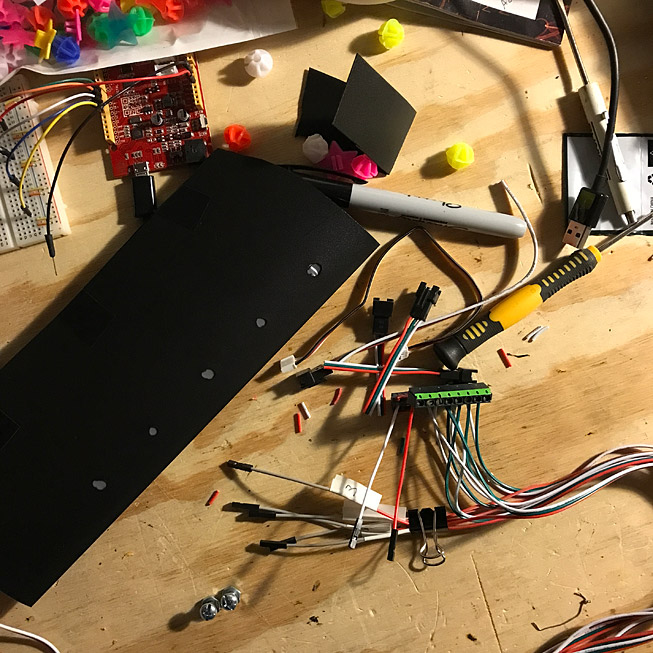
Assembling the hardware was very simple. The AI Module is very small and mated well with an ESP32. Each board has a separate USB connector. The AI Module needs that for uploading models and checking the camera feed. The ESP32 worked with the standard Arduino IDE. I added the custom board libraries from Seeed to ensure compatibility.
In the beginning I did most of the AI work directly connected to the AI Module and not through the ESP32. It was the only way to see a video feed of what I was getting.
One of the reasons I put so much effort into this project was to use custom AI models. I wasn’t interested in doing yet another demo of a face recognition or pets or whatever. I’m interested in exploring new human-machine interfaces for creative output. This particular module has the ability to use custom models.
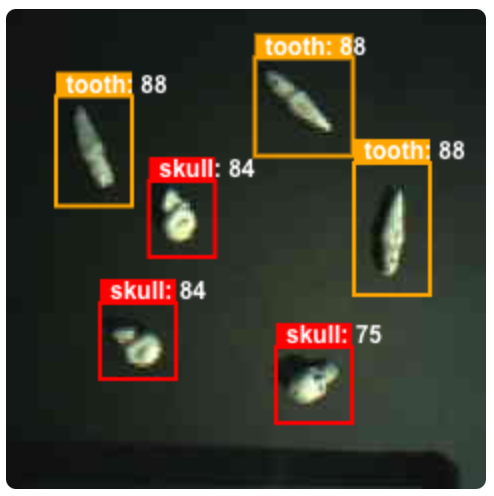
So, I tried to follow the Seeed instructions for creating a model. It was incredibly time consuming and there were many problems. The most effective tip I can offer is to use the actual camera connected to the board to generate training images AND to clean-up those images in Photoshop or Gimp. I went through a lot of trial and error with paramters and context. Having clean images fixed a lot of the recognition issues. I generated and annotated 176 images for training. That took 5-6 hours and the actual training in the Collab notebook took 2-3 hours with different options.
Here is my recipe:
Use a simple Arduino sketch to record jpegs from the camera onto an SD card.
In an image editor, apply Reduce Noise and Levels to the images to normalize them. Don’t use “Auto Levels” or any other automatic toning.
The images will be 240px X 240px. Leave them that size. Don’t export larger.
In Roboflow choose “Object Detection”, not “Instance Segmentation”, for the project.
When annotating, choose consistent spacing between your bounding box and the edges of your object.
Yes, you can annotate multiple objects in a single image. It’s recommended.
For preprocessing, I chose “Filter Null and “Grayscale”.
For augmentation, I chose “Rotate 90”, “Rotation”, and “Cutout”. I did NOT use “Mosaic” as recommended in the Seeed Wiki. That treatment already happens in the Collab training script.
I exported the dataset using JSON > COCO. None of the other options were relevant.
The example Google Collab notebook I used was the rock/paper/scissors version (Gesture_Detection_Swift-YOLO_192). I only had a few objects and it was the most relevant.
I left the image size at 192×192 and trained for 150 epochs. The resulting TFLite INT8 model was 10.9mb.
I used the recommend web tool to connect directly to the AI Module and upload the model. It took multiple tries.
On the ESP32 I installed MQTT and used that to transmit the data to my Raspberry Pi. I did not use the on-board wifi/MQTT setup of the AI Module.
This was a difficult project because of very confusing and incomplete documentation at mutiple stages. It’s clear to me that the larger companies don’t actually want us to be able to do all this ourselves. There were times it felt intentionally obfuscated to force me to buy a premium tier and some unrelated commercial application. I’m glad I did it though, because I learned some important concepts and limitations of AI training.
Demo
A demo of different sounds and arrangements produced by the assembly.
Conclusion
I’ll use this knowledge to finish a new build of the actual Oracle music composition platform I started. This particular demo is interesting, but a somewhat unpredictable and technically fragile. I found the research on generative music to be the most interesting part. As for the AI, I’m sure all this will be simplified and optimized in the future. I just hope the technology stays open enough for artists to use independently.
This year saw the completion of new sound sculptures and large installation work. It offered up new performance contexts and an expansion of exhibition options. The projects have grown in scale and scope, but the internal journey continues.
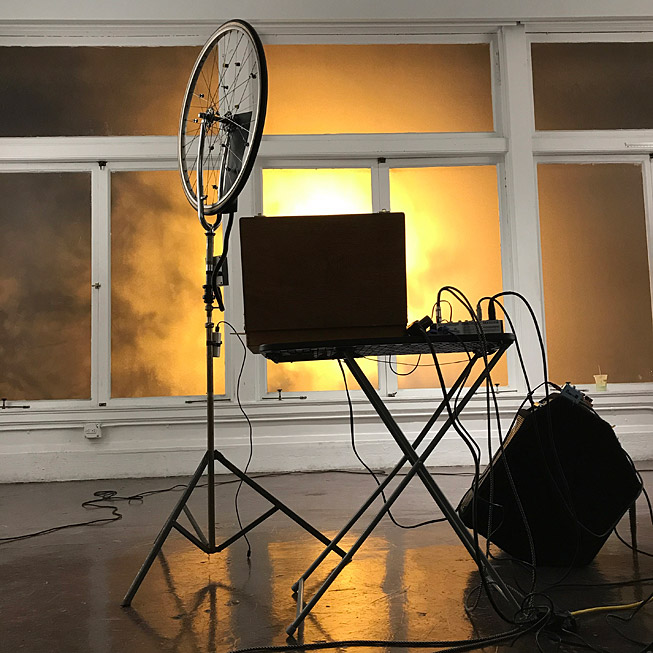
Wheel of Misfortune
A few years ago I noticed neighborhood kids putting empty water bottle into spokes of the back wheels of their bikes. They got a cool motorcycle sound out of it. One of them had two bottles offset and that produced a rhythmic but offbeat cycle that sounded interesting.
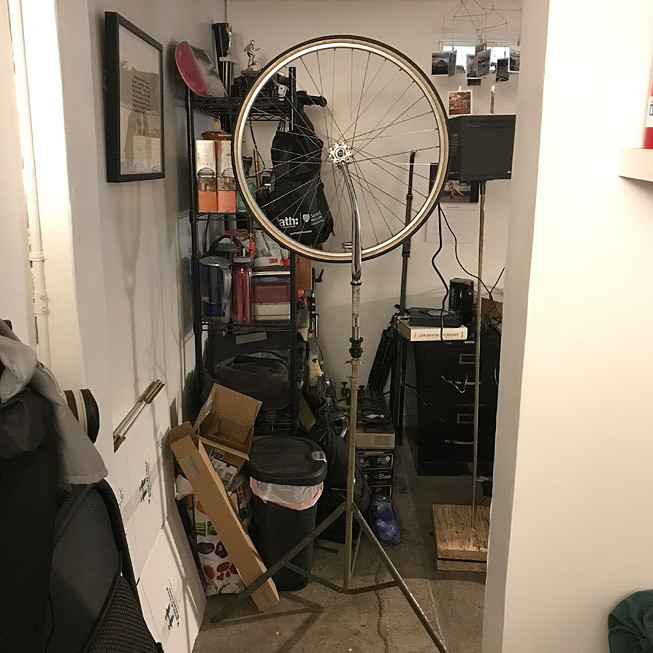
It gave me the idea to use a bicycle wheel for repeating patterns the way drum machines an sequencers do. I also thought it would be an interesting object to build from a visual standpoint.
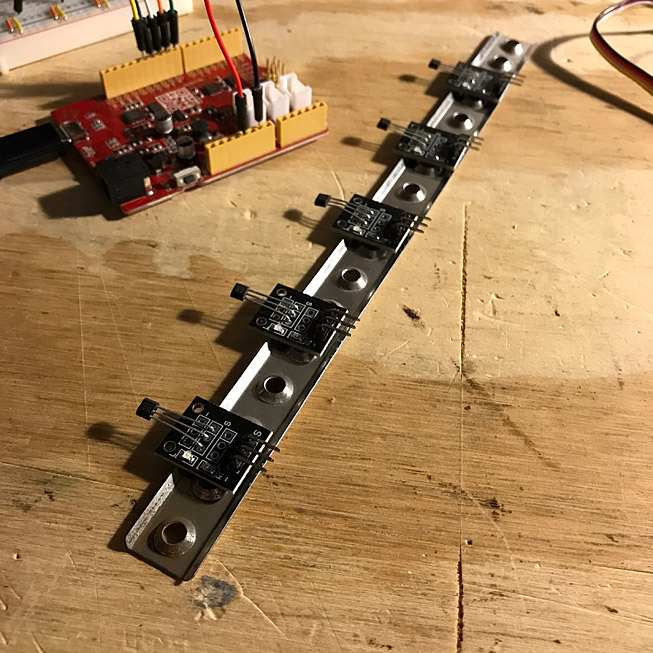
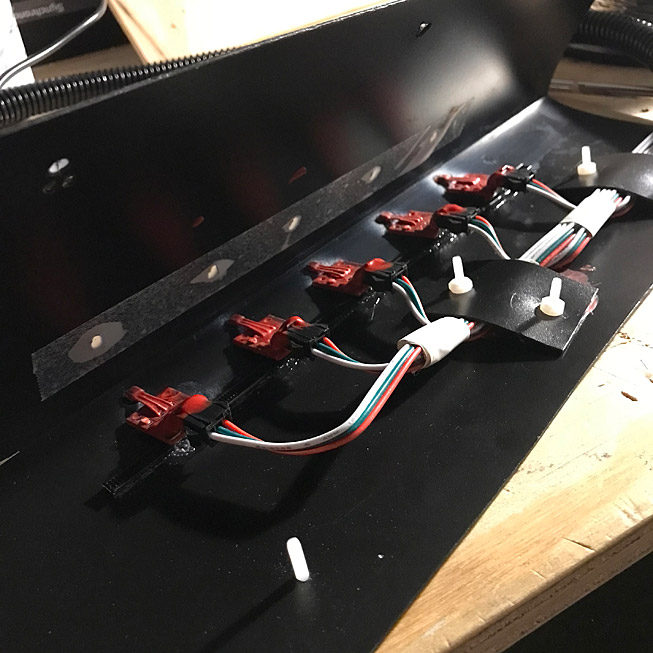
The original wheel with a fresh set of chrome forks from Good Karma Bikes44E Hall effect switchesMagnets on spoke clips44E sensors covered in liquid tapeRaspberry Pi A+ used to read sensors and transmit OSC messages over wifiHall effect sensors mounted on cut plasticChecking the LED windows in the blade assemblyArduino reading a contact mic circuit connected through a bamboo chopstickArduino reading contact mic then sending serial data to Fluidsynth
It took a while, but having the workspace to lay out larger electronics assemblies was helpful. I settled on five sensors in a bladed array reading magnets attached to the spokes.
To switch between the instruments I came up with a contact mic trigger using a chopstick and an Arduino. It has a satisfying crack when tapped and cycles the noise patches effectively.
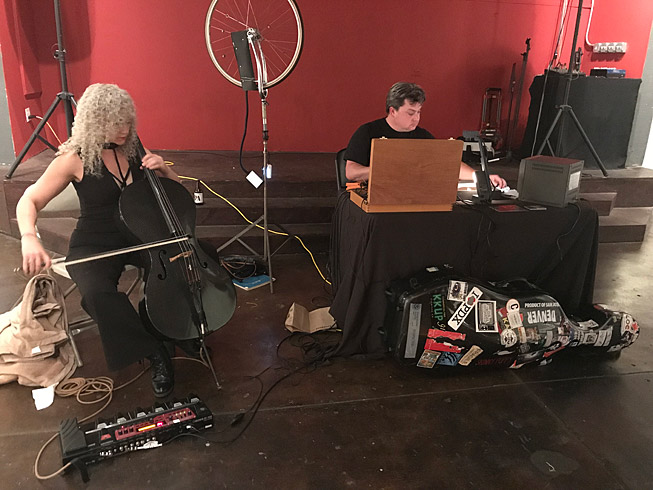
The Wheel got a loud and powerful public test at Norcal Noisefest. People responded not only to novelty of the bicycle wheel, but the badass sound it could make.
I get asked to do sound performances more often these days and it can be challenging because I don’t have much outboard musical gear. So, I have a general effort to create more gear to use live. A common need is to have an interesting way of triggering longform loops I created in my studio.
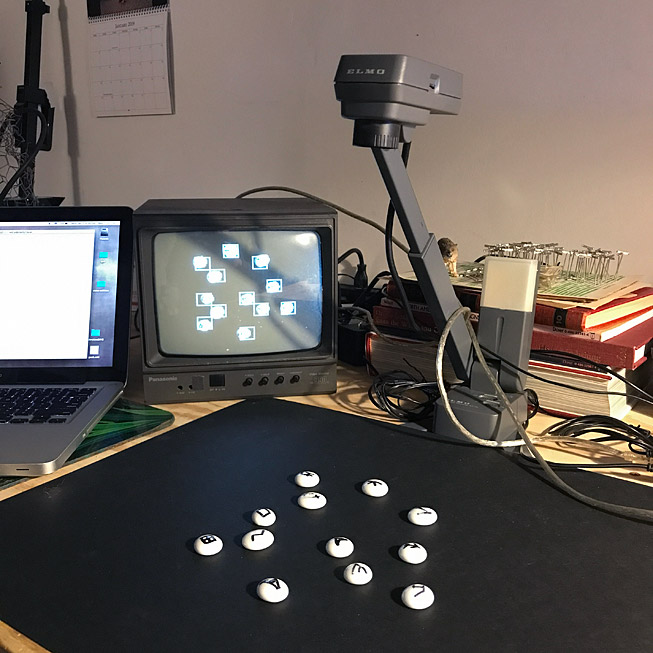
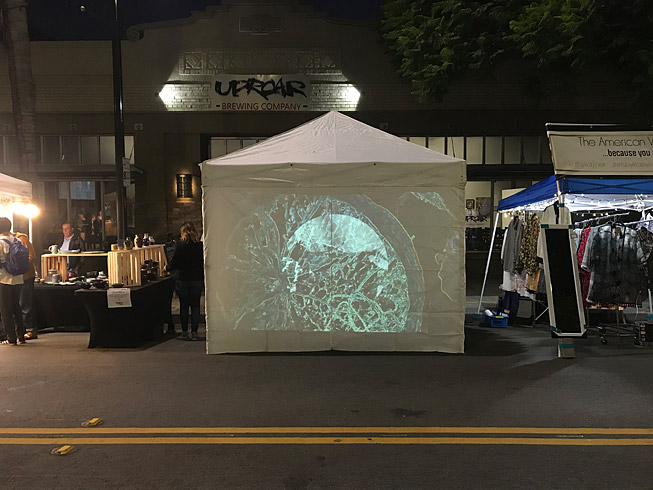
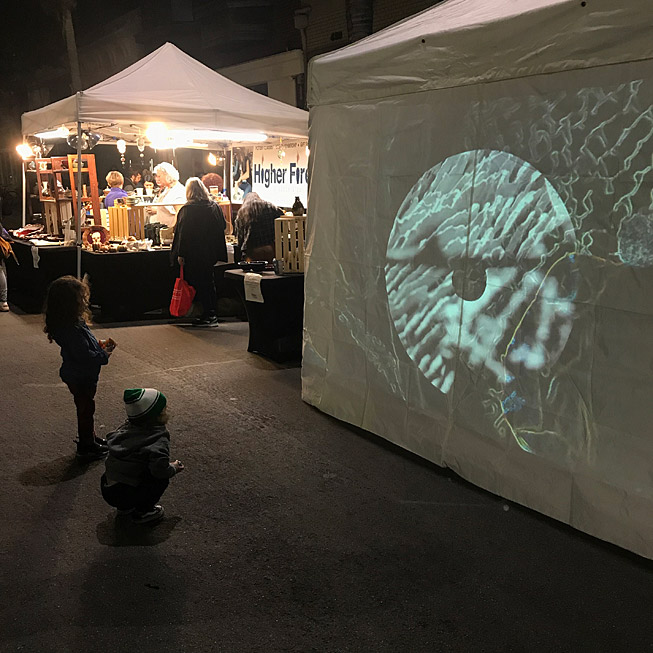
Taking a cue from the grid controllers used by Ableton Live, I had the idea to build a player that keyed off objects placed under a camera. Reading location and size, it could arrange loops in a similar way.
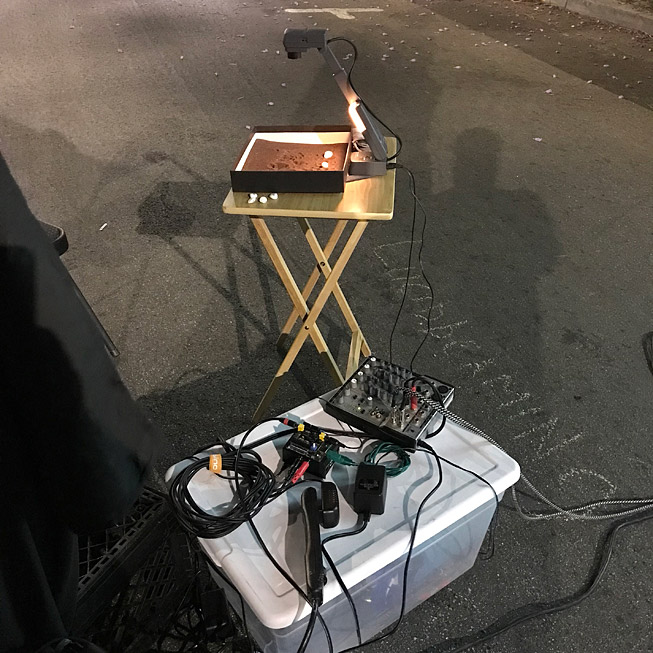
The project kicked off with an analog video stand I found that was used for projecting documents in a business presentation. I connected that to a primitive but very effective computer vision board for Arduino called the Video Experimenter.
After months of testing with different objects I settled on small white rocks that brought inherent contrast. At a library sale I picked up a catalog of pictograms from Chinese oracle bones that had fascinating icons to predict the future with.
That clinched the theme of an “oracle” divining the future of a musical performance rather than a musician executing a planned performance.
It has turned out to be really flexible for performances and is a crowd favorite, especially when I let people place the stones themselves.
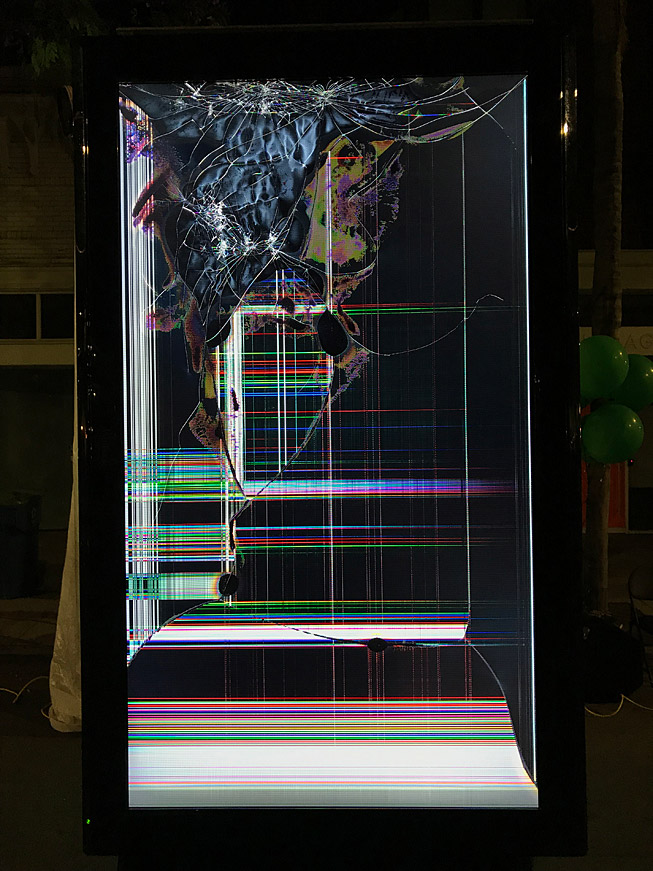
Delphi
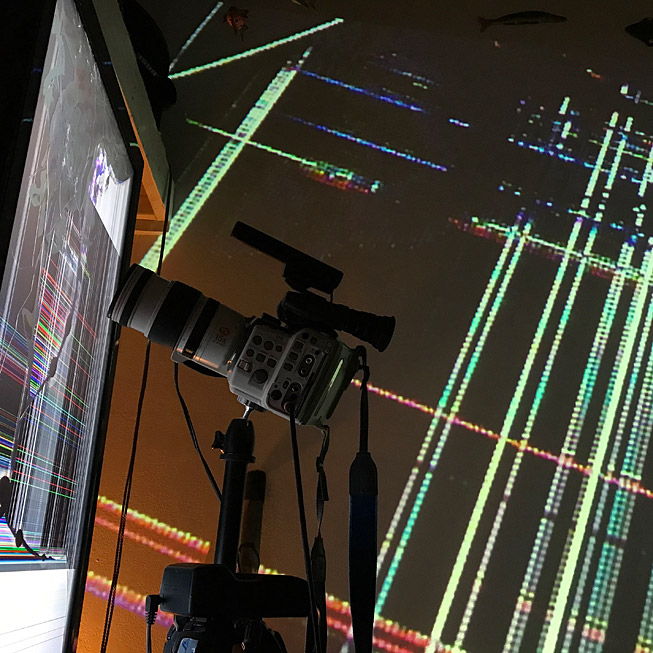
Looks cool, huh? I wish I could say it was intentional. I smashed the screen while loading the equipment for SubZERO this year. meh, I just went with it.
People give me things, usually broken things. I don’t collect junk though. I learned the hard way that some things take a lot of work to get going for very little payoff. Also, a lot of modern tech is mostly plastic with melted rivets and tabs instead of screws or bolts. They weren’t meant to be altered or repaired.
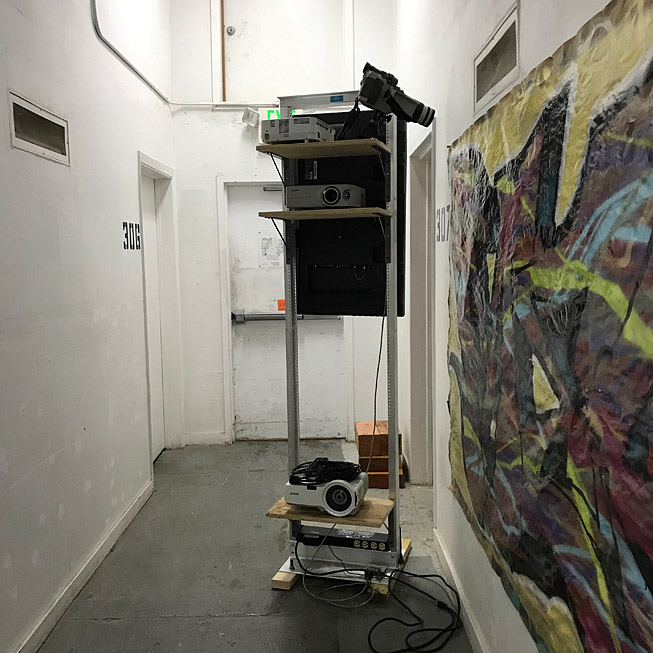
Big screen TVs are a good example. One of the ways they got so cheap is the modular way they get made with parts that weren’t meant to last. I got a fairly large one from Brian Eder at Anno Domini and was interested in getting it back up.
Unfortunately, a smashed HDMI board required some eBay parts and it took more time than expected. Once it was lit up again and taking signal I started running all kinds of content through the connector boards.
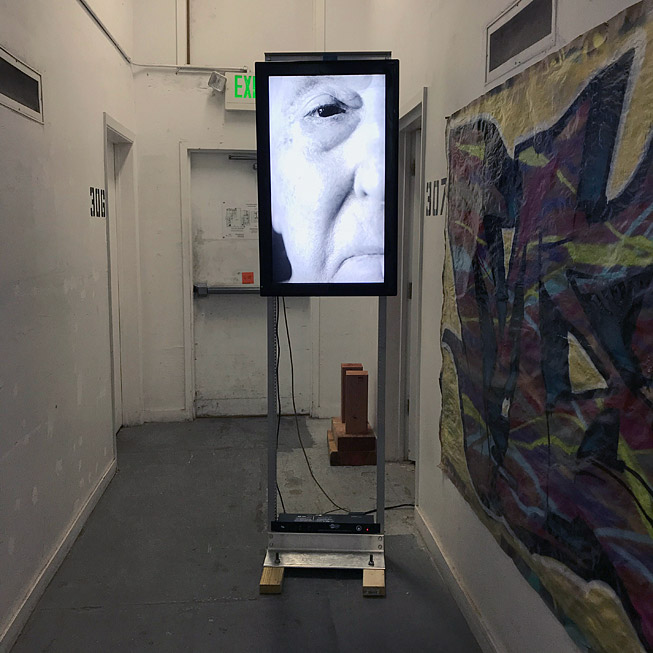
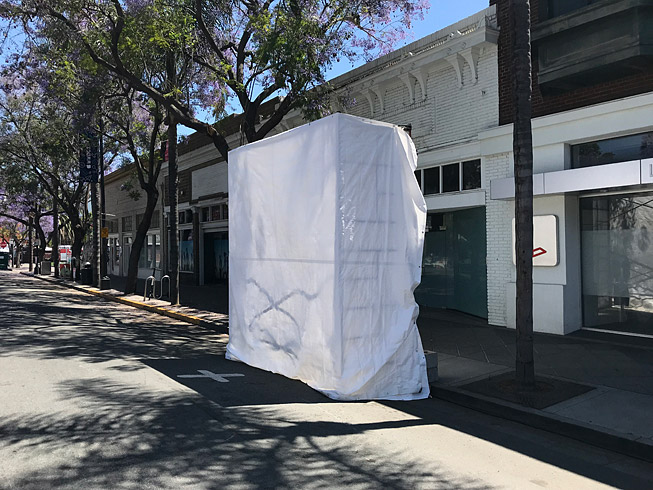
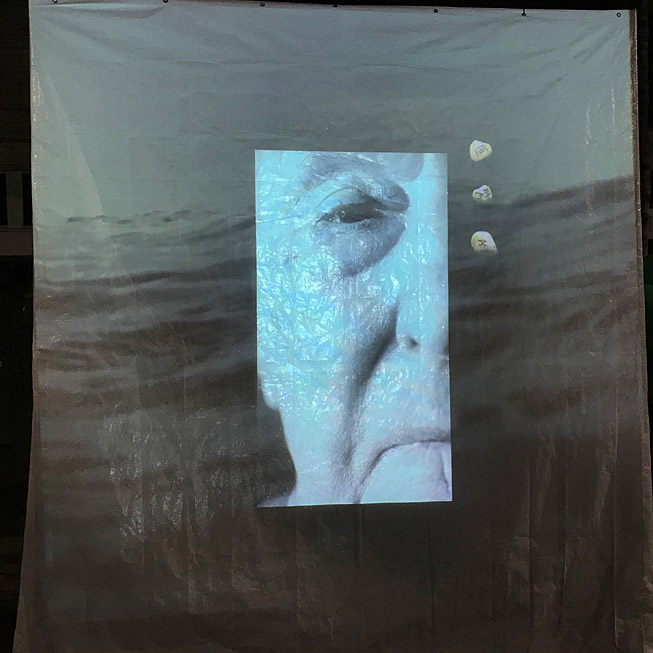
When hung vertical, it resembled one of those Point-of-Purchase displays you see in cell phone stores. I though about all the imagery they use to sell things and it gave me the idea of showing something more human and real.
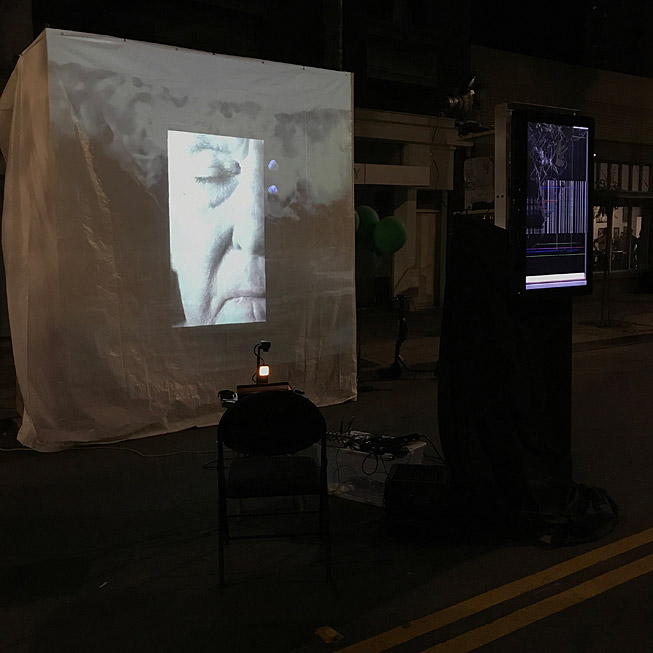
In society that fetishizes youth culture and consumption, we tend to fear aging. I decided to find someone at a late stage of of life to celebrate and display four feet high.
That person turned out to be Frank Fiscalini. At 96 years old he has led a full rich life and is still in good health and spirits. It took more than a few conversations to explain why I wanted to film a closeup of his eyes and face, but he came around.
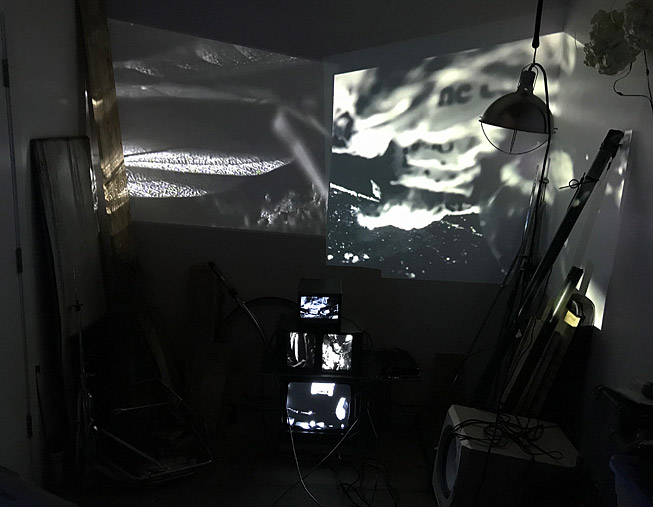
I set the TV up in my studio with his face looping for hours, slowly blinking. I had no real goal or idea of the end. I just lived with Mr. Fiscalini’s face for a while.
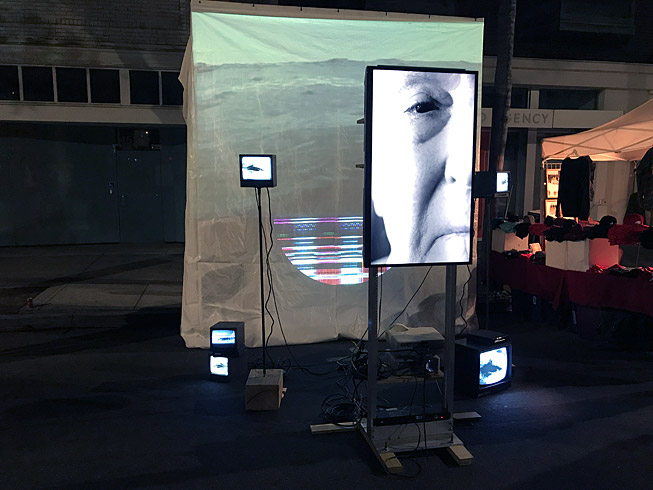
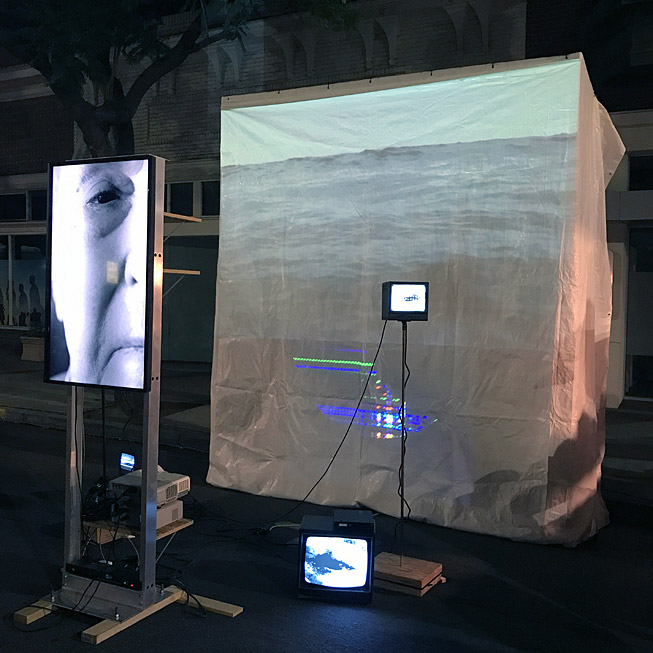
I thought a lot about time and how we elevate specific times of our lives over others. In the end, time just keeps coming like waves in the ocean. I happen to have a fair amount of ocean footage I shot with a waterproof camera.
With the waves projected behind his face, my studio was transformed into a quiet meditation on time and humanity.
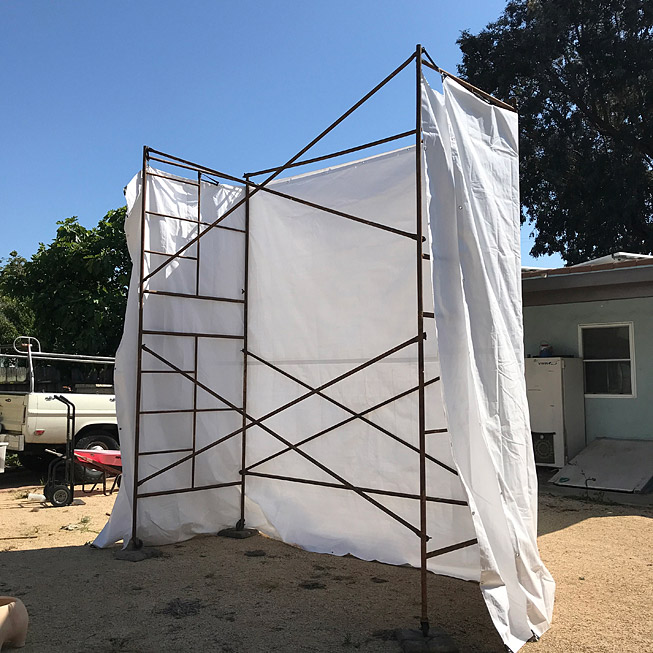
Other contributions of building scaffolding and P.A. speakers formed the basis of a large-scale installation. Around this time, I had also been reading a strange history of the Oracle of Delphi.
At first the “oracle” was actually a woman whose insane rants were likely the result of hallucinations from living over gas events. A group of men interpreted what she said and ended up manipulating powerful leaders for miles.
Thus Delphi was formed conceptually. The parallels to modern politics seemed plain, but I’ve been thinking a lot about the futility of trying to control or predict the future. This felt like a good time for this particular project.
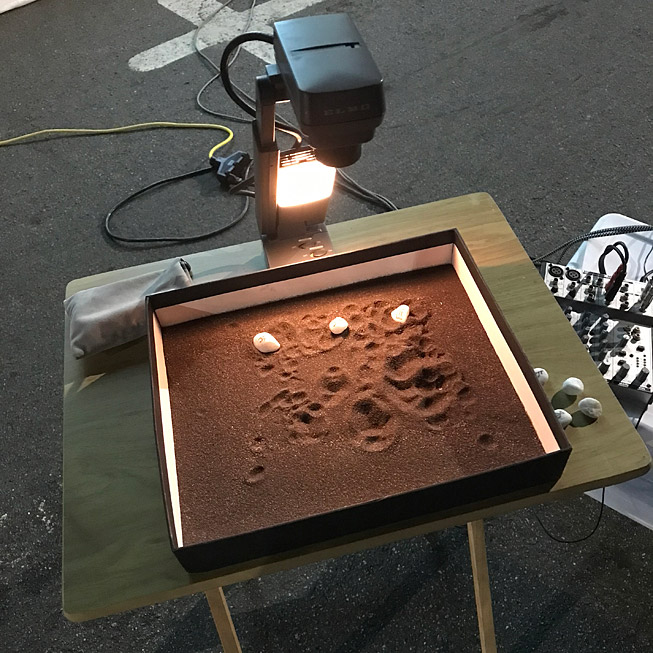
Balloon synth
The annual SubZERO Festival here in San Jose has been an anchor point for the past few years. One challenge I’ve faced is the strong breeze that blows through in the hour before sunset. For delicate structures and electronics on stands, it’s a problem. Instead of fighting it this year, I decided to make use of it.
I had an idea to put contact mics on balloons so when the wind blew, the balloons would bounce against each other. I thought they might be like bass bumping wind chimes.
Thanks to a generous donation by Balloonatics, I had 15 beautiful green balloons for the night of the festival. Hooked up to mics and an amplifier, they made cool sounds. But, it took a bit more force than the breeze to move them forcefully enough.
Kids figured out they could bump and play with the balloons and they would make cool noises. Sure enough, it drew a huge crowd quickly. People came up to the balloons all night and punched and poked them to get them to make noise.
On the second night, though, the balloons were beat. Some rowdy crowds got too aggro and popped a bunch of them. Anyway, they were a big hit and it was fun to have something like that around.
Belle Foundation grant
An early surprise of the year was getting an envelope from the Belle Foundation with an award for one the year’s grants. I was stoked to be included in this group.
My application was simple and I talked a lot about SubZERO projects and working with older technology. In other words, what I actually do. To get chosen while being real about the art I make was refreshing.
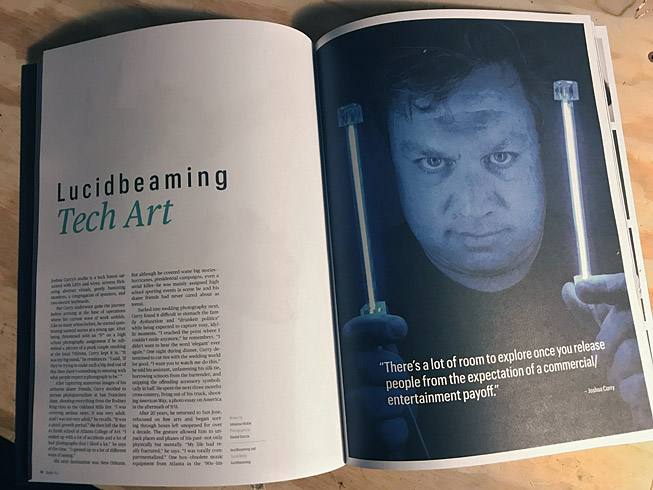
Content Magazine profile
Before I moved back to California in 2012, I worked at an alt-weekly newspaper in Charleston, SC. I photographed all kinds of cultural events and wrote profiles of artists and musicians. But, I was always on the other side of the interview, as the interviewer.
Daniel Garcia from local magazine Content reached out in the beginning of this year and said they were interested in profiling of me and my work. The tables had turned.
Opening portrait and write-up in Content
Writer Johanna Hickle came by my Citadel art studio and spent a generous amount of time listening to me ramble about tech and such. Her write-up was solid and she did a good job distilling a lot of info.
Collage and write-up in Content magazine
It was nerve-wracking for me, though. I knew the power they had to shape the story in different directions. I was relieved when it came out fine and had fun showing it to people.
Norcal Noisefest
In 2017, I went to the Norcal Noisefest in Sacramento. It had a huge impact on my music and approach to anything live. I came back feeling simultaneously assaulted and enlightened.
Over the past two years, I’ve built a variety of live sound sculptures and performed with most of them. This year the focus was on the new Wheel of Misfortune. I reached out to Lob Instagon, who runs the festival, and signed up for a slot as a performer at Norcal Noisefest in October.
Coincidentally, I met Rent Romus at an Outsound show in San Francisco and told him about performing at Noisefest. Rent puts on all kinds of experimental shows in SF and he suggested a preview show at the Luggage Store.
So I ended up with a busy weekend with those shows and an installation at First Friday.
Norcal Noisefest was a blast and I got see a bunch of rad performances. My set sounded like I wanted, but I have a ways to go when it comes to stage presence. Other people were going off. I have to step things up if I going to keep doing noise shows
Flicker glitch
I have been making short-form abstract videos for the past few years. Most have a custom soundtrack or loop I make. This year I collected the best 87 out of over 250 and built a nice gallery for them on this site.
Studio projection hijinksGlitched feedbackCloser at First FridayKids watching Closer
Every once in a while I get requests from other groups and musicians to collaborate or make finished visuals for them. Most people don’t realize how much time goes into these videos and I’m generally reluctant to collaborate in such an unbalanced way.
I was curious about making some longer edited clips though. I responded to two people who reached out and made “music videos” for their pre-existing music. It wasn’t really collaborative, but I was ok with that because email art direction can be tricky.
The first, Sinnen, gave me complete freedom and was releasing an album around the same time. His video was a milestone in my production flow. It was made entirely on my iPhone 7, including original effects, editing and titles. I even exported at 1080p, which is a working resolution unthinkable for a small device just five years ago. They could shoot at that fidelity, but not manipulate or do complex editing like that.
The next video was much more involved. It was for a song by UK metal band Damim. The singer saw my videos on Instagram and reached out for permission to use some of them. I offered to to just make a custom video instead.
All the visuals were done on my iPhone, with multiple generations and layers going through multiple apps. I filled up my storage on a regular basis and was backing it up nightly. Really time consuming. Also, that project required the horsepower and flexibility of Final Cut Pro to edit the final results.
I spent six months in all, probably 50 hours for so. I was ok with that because it was a real world test of doing commissioned video work for someone else’s music. Now I know what it takes to produce a video like that and charge fairly in the future.
New photography
Yes, I am still a photographer. I get asked about it every once in awhile. This year I came out with two different small bodies of work shooting abstracts and digitizing some older work.
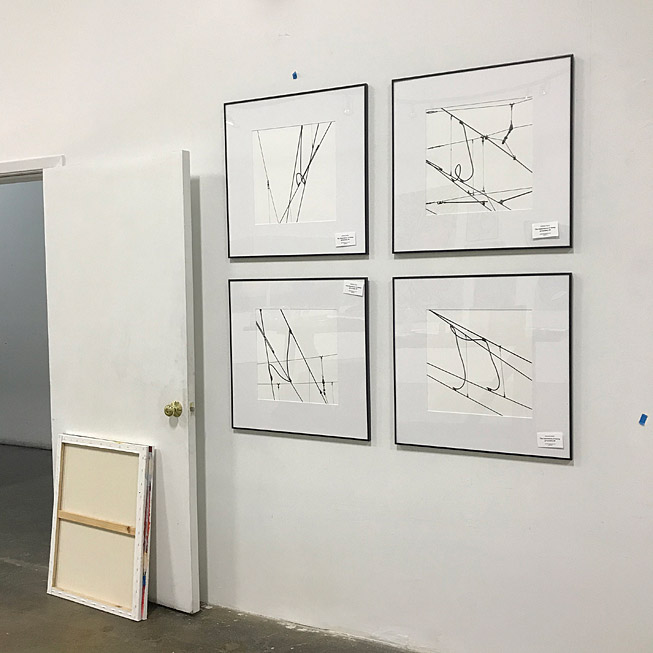
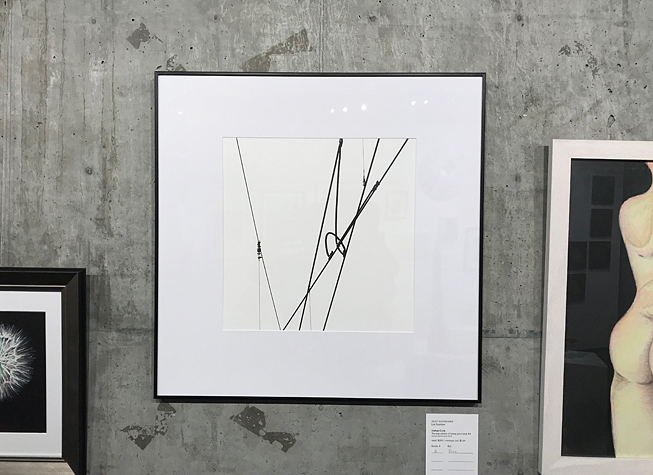
Grounded series at a Citadel show near downtown San Jose, CA
These monochromatic images are sourced from power wires for the local light rail (VTA) sub-station on Tasman Rd. I drove by this cluster everyday on a tech job commute for about a year. I swore that when the contract was over I was going to return and photograph all the patterns I saw overhead.
I did just that and four got framed and exhibited at Citadel. One was donated to Works gallery as part of their annual fundraiser.
Importance of being grounded at Works
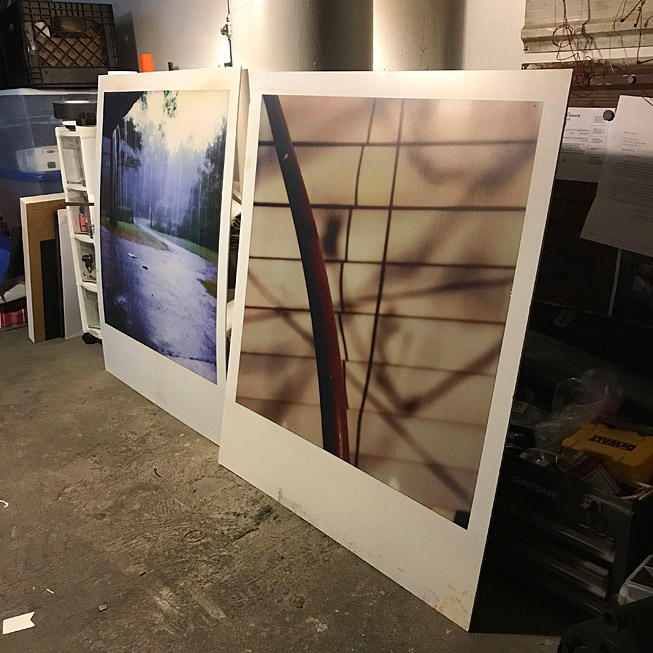
The Polaroids come from a project I had in mind for many years. Back when Polaroid was still manufacturing SX-70 instant prints, I shot hundreds of them. I always envisioned enlarging them huge to totally blow out the fidelity (or lack of it).
Enlarged Polaroid prints
This year I began ordering 4 foot test prints on different mounting substrates. To that I ended up scanning a final edit of 14 from hundreds. To see them lined up on the screen ready for output was a fulfilling moment. Having unfinished work in storage was an issue for me for a long time. This was a convergent conclusion of a range of artistic and personal issues.
Passing it on
Now that I have a working art studio, I have a place to show people when visit from out of town. The younger folks are my favorite because they think the place is so weird and like because of that. I share that sentiment.
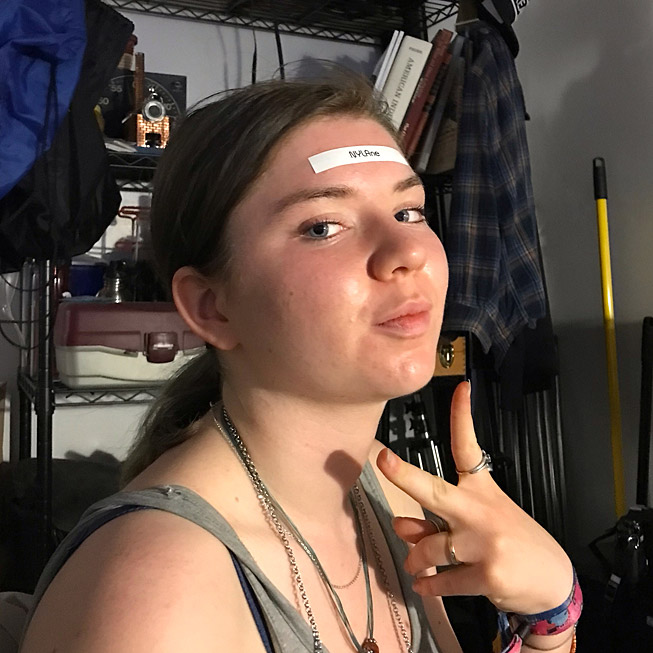
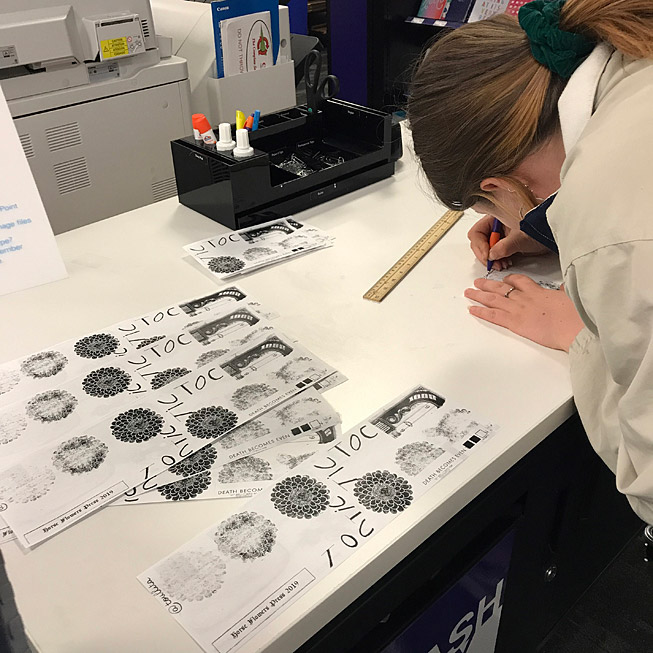
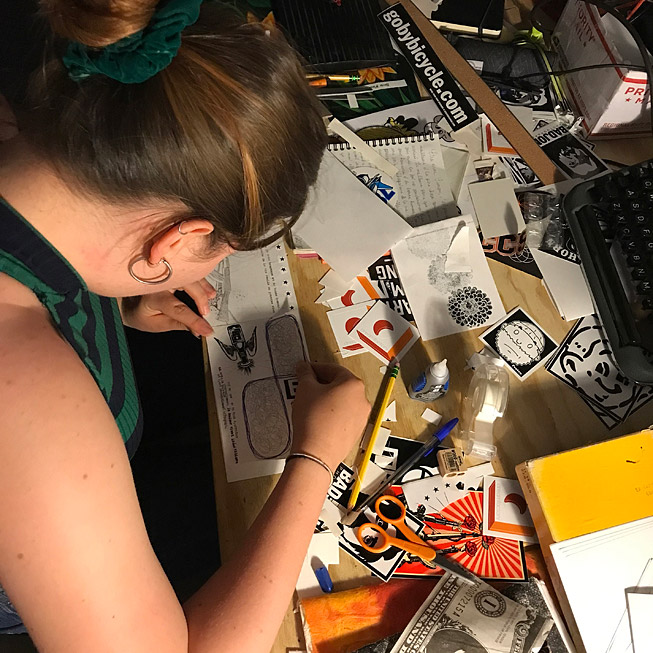
My French cousins Toullita and Nylane came by for a day and we made zines. Straight up old school xerox zines with glue and stickers and scissors. It was a rad day filled with weird music and messy work.
Label maker was popularFolding foliosLayout and collagingFinal spread
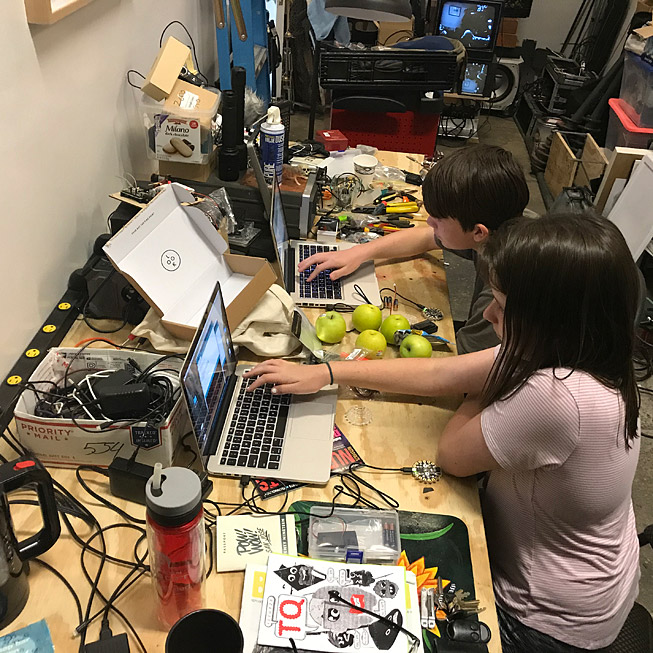
More locally, I had two younger cousins from San Francisco, Kieran and Jasmina, spend a day with me. They’ve grown up in a world immersed in virtual experiences and “smart” electronics. My choice for them was tinkering with Adafruit Circuit Playground boards.
Cousins collaborating on code for apple triggered capacitance synths
They got to mess with Arduino programs designed to make noise and blink lights. At the end they each built capacitive touch synthesizers that we hooked up to apples. Super fun. Later that night we took them to a family dinner and they got to explain what they had made and put on a little demo.
Next up
The wolves are still howling and running. My longtime project to build standalone wolf projections made a lot of progress this year. I had hoped to finish it before the last First Friday of the year, but that wasn’t in the cards.
Getting something to work in the studio is one thing. Building it so it is autonomous, self-powered, small, and can handle physical bumps, is a whole different game. But, I do have the bike cargo trailer and power assembly ready. The young cousins even got a chance to help test it.
A new instrument I’ve been working on is a Mozzi driven Arduino synth enclosed in an old metal Camel cigarettes tin. It has been an evergreen project this year, offering low stakes programming challenges to tweak the sounds optimize everything for speed.
One need I had was a precise drill for specific holes. A hand drill could do it, but I had a cleaner arrangement in mind. As luck would have it, another cousin in San Luis Obispo had an extra drill press to donate. Problem was, it was in rough shape and rusted pretty bad.
I brought it back and doused it in PB B’Laster Penetrating Catalyst. That made quick work of the frozen bolts and a range of grinders and rotary brushes handled the other rust. It looks great and is ready to make holes for the Camel synth.
Finis
It’s been a good year artistically. I had some issues with living situations and money, but it all evened out. I’m grateful to have this kind of life and look forward to another year of building weird shit and making freaky noise.
One of the reasons I’ve spent so much time experimenting with audio software on Raspberry Pis is to build standalone music sculpture. I want to make machines that explore time and texture, in addition to generating interesting music.
The first soft synth I tried was Fluidsynth. It’s one of the few that can run headless, without a GUI. I set it up on a Pi 3 and it worked great. It’s used as a basic General MIDI synthesizer engine for a variety of packages and even powers game soundtracks on Android.
This video is a demo of the same sound set used in this project, but on an earlier iteration using a regular Raspberry Pi 3 and a Pimoroni Displayotron HAT. I ended up switching to the smaller Raspberry Pi Zero W and using a webapp instead of a display.
The sounds are not actually generated from scratch, like a traditional synthesizer. It draws on a series of predefined sounds collected and mapped in SoundFonts. The .sf2 format was made popular by the now defunct Sound Blaster AWE32 sound card that was ubiquitous on 90s PCs.
Back then, there was a niche community of people producing custom SoundFonts. Because of that, development in library tools and players was somewhat popular. Fluidsynth came long after, but benefits from the early community work and a few nostalgic archivists.
The default SoundFont that comes with common packages is FluidR3_GM. It is a full General Midi set with 128 instruments a small variety of drum kits. It’s fine for building a basic keyboard or MIDI playback utility. But, it’s not very high fidelity or interesting.
What hooked me was finding a repository of commercial SoundFonts (no longer active). That site has an amazing collection of 70s-90s synths in SoundFont format, including Jupiter-8, TB-303, Proteus 1/2/3, Memory Moog, and an E-MU Modular. The E-MU Modular sounds pretty rad and is the core of the sound set I put together for this. They’re all cheap and I picked up a few to work with. The sound is excellent.
For this particular project, I ended up using a Raspberry Pi Zero W for its size and versatility. Besides running Fluidsynth, it also serves up a Node.js webapp over wifi for changing instruments. It’s controllable by any basic USB MIDI keyboard and runs on a mid-sized USB battery pack for around 6 hours. Pretty good for such a tiny footprint and it costs around $12.
Setting it up
If you want to get something working fast or just want to make a kid’s keyboard, setup is a breeze.
After configuring the Pi Zero and audio:
sudo apt-get install fluidsynth
That’s it.
But, if you want more flexibility or interactivity, things get a bit more complex. The basic setup is the same as what I laid out in my ZynAddSubFX post.
Download Jessie Lite and find a usable Micro SD card. The following is for Mac OS. Instructions for Linux are similar and Windows details can be found on the raspberrypi.org site.
Insert the SD card into your computer and find out what designation the OS gave it. The unmount it and write the Jessie Lite image to it.
diskutil list

/dev/disk1 (external, physical):
 #: TYPE NAME SIZE IDENTIFIER
 0: FDisk_partition_scheme *8.0 GB disk1
 1: Windows_FAT_32 NO NAME 8.0 GB disk1s1

diskutil unmountDisk /dev/disk1

sudo dd bs=1m if=2017-04-10-raspbian-jessie-lite.img of=/dev/rdisk1
Pull the card out and reinsert it. Then, add two files to the card to make setup a little faster and skip a GUI boot.
cd /Volumes/boot
touch ssh

sudo nano wpa_supplicant.conf
Put the card in the Pi Zero and power it up, then configure the box with raspi-config. One trick I learned was not to change the root password and expand the file system at the same time. I’m not sure what the problem is, but often it corrupts the ssh password to do both at the same time.
Update the Pi:
sudo apt-get update
sudo apt-get upgrade
Fluidsynth needs a higher thread priority than the default, so I use the same approach as setting up Realtime Priority. It might be overkill, but it’s consistent with the other Pi boxes I set up. Add the user “pi” to the group “audio” and then set expanded limits.
sudo usermod -a -G audio pi

sudo nano /etc/security/limits.d/audio.conf
The file should be empty. Add this to it.
@audio - rtprio 80
@audio - memlock unlimited
If you’re not using an external USB audio dongle or interface, you don’t need to do this. But, after you hear what the built-in audio sounds like, you’ll want something like this.
A voice should speak out the left and right channels. After verifying that, it’s time to set up Fluidsynth.
The reason I compile it from the git repo is to get the latest version. The version in the default Raspbian repository used by apt-get is 1.1.6-2. The latest is 1.1.6-4. The reason we need this is Telnet.
That’s right, Fluidsynth uses Telnet to receive commands and as its primary shell. It’s a classic text based network communication protocol used for remote administration. Think Wargames.
But, there’s a bug in the standard package that causes remote sessions to get rejected in Jessie. It’s been addressed in the later versions of Fluidsynth. I needed it to work to run the web app.
Grab the dependencies and then compile Fluidsynth. It’s not complicated, but there are some caveats.
sudo apt-get install git libgtk2.0-dev cmake cmake-curses-gui build-essential libasound2-dev telnet

git clone git://git.code.sf.net/p/fluidsynth/code-git

cd code-git/fluidsynth
 mkdir build
 cd build
 cmake ..
 sudo make install
The install script misses a key path definition that aptitude usually handles, so I add it manually. It’s needed so libfluidsynth.so.1 can be found. If you see an error about that file, this is why.
Now we need to grab the default SoundFont. This is available easily with apt-get.
sudo apt-get install fluid-soundfont-gm
That’s it for Fluidsynth. It should run fine and you can test it with a help parameter.
fluidsynth -h
Now to install Node.js and the webapp to change instruments with.
curl https://raw.githubusercontent.com/creationix/nvm/master/install.sh | sh
Logout and log back into an ssh session. That makes nvm available.
nvm install v6.10.1
Grab the webapp from my repo and install it.
git clone https://github.com/lucidbeaming/Fluidsynth-Webapp.git fluidweb

cd fluidweb

npm install --save
Find the IP address of you Pi on your local network. Visit <ip address> port 7000 on any other device.
http://192.168.1.20:7000
If Fluidsynth isn’t running, it will display a blank page. If it is running, it will list all instruments available, dynamically. This won’t be much of a problem once the launch script is setup. It launches Fluidsynth, connects any keyboards attached through ALSA, and launches the webapp.
Create the script and add the following contents. It’s offered as a guideline and probably won’t work if copied and pasted. You should customize it according to your own environment, devices, and tastes.
sudo nano fluidsynth.sh
#!/bin/bash

if pgrep -x "fluidsynth" > /dev/null
then
echo fluidsynth already flowing
else
fluidsynth -si -p "fluid" -C0 -R0 -r48000 -d -f ./config.txt -a alsa -m alsa_seq &
fi

sleep 3

mini=$(aconnect -o | grep "MINILAB")
mpk=$(aconnect -o | grep "MPKmini2")
mio=$(aconnect -o | grep "mio")

if [[ $mini ]]
then
aconnect 'Arturia MINILAB':0 'fluid':0
echo MINIlab connected
elif [[ $mpk ]]
then
aconnect 'MPKmini2':0 'fluid':0
echo MPKmini connected
elif [[ $mio ]]
then
aconnect 'mio':0 'fluid':0
echo Mio connected
else
echo No known midi devices available. Try aconnect -l
fi

cd fluidweb
node index.js
cd ..

exit
Note that I included the settings -C0 -R0 in the Fluidsynth command. That turns off reverb and chorus, which saves a bit of processor power and doesn’t sound good anyway.
Now, create a configuration file for Fluidsynth to start with.
The select command chooses instruments for various channels.
select <channel> <soundfont> <bank> <program>
Note that channel 9 is the drumkit.
To get the launch script to run on boot(or session) it needs to have the right permissions first.
sudo chmod a+x fluidsynth.sh
Then, add the script to the end of .bash_profile. I do that instead of other options for running scripts at boot so that fluidsynth and node.js run as a user process for “pi” instead of root.
sudo nano .bash_profile
At the end of the file…
./fluidsynth.sh
Reboot the Pi Zero and when it gets back up, it should run the script and you’ll be good to go. If you run into problems, a good place to get feedback is LinuxMusicians.com. They have an active community with some helpful folks.
Here’s another quick demo I put together. Not much in terms my own playing, haha, but does exhibit some of the sounds I’m going for.
Most of my music is production oriented and I don’t have a lot of live performance needs. But, I do want a useful set of evocative instruments to take to strange places. For that, I explored the options available for making music with Raspberry Pi minicomputers.
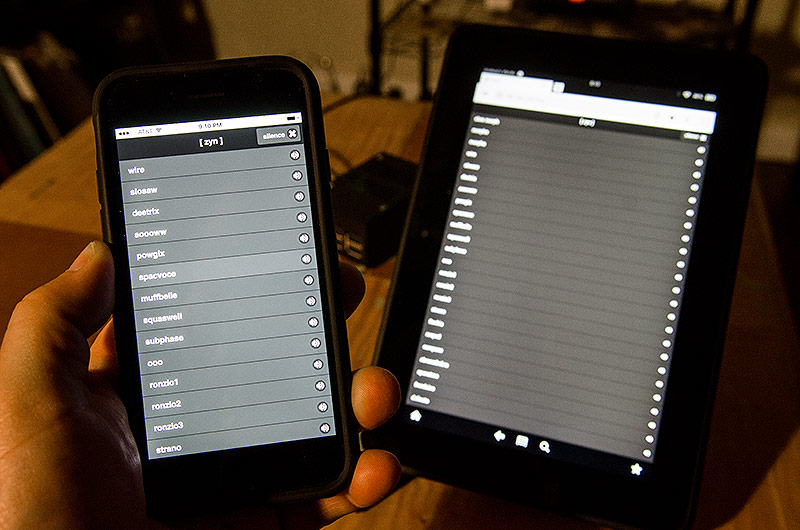
The goal of this particular box was to have the Linux soft-synth ZynAddSubFX running headless on a battery powered and untethered Raspberry Pi, controllable by a simple MIDI keyboard and an instrument switcher on my phone.
Getting things to run on the desktop version of Raspbian and ZynAddSubFX was pretty easy, but stripping away all the GUI and introducing command line automation with disparate multimedia libraries was a challenge. Then, opening it up to remote control over wifi was a rabbit hole of its own.
But, I got it working and it sounds pretty amazing.
Setting up the Raspberry Pi image
I use Jessie Lite because I don’t need the desktop environment. It’s the same codebase without a few bells and whistles. When downloading from rasperrypi.org, choose the torrent for a much faster transfer than getting the ZIP directly from the site. These instructions below are for Mac OS X, using Terminal.
diskutil list
/dev/disk1 (external, physical): #: TYPE NAMESIZE IDENTIFIER 0: FDisk_partition_scheme*8.0 GB disk1 1: DOS_FAT_32 NO NAME 8.0 GB disk1s1
The card gets removed from the laptop and inserted into the Pi. Then, after it boots up I go through the standard setup from the command line. The default login is “pi” and the default password is “raspberry”.
sudo raspi-config
[enable ssh,i2c. expand filesystem. set locale and keyboard.]
After setting these, I let it restart when prompted. When it comes back up, I update the codebase.
sudo apt-get update
sudo apt-get upgrade
Base configuration
ZynAddSubFX is greedy when it comes to processing power and benefits from getting a bump in priority and memory resources. I add the default user (pi) to the group “audio” and assign the augmented resources to that group, instead of the user itself.
sudo usermod -a -G audio pi

sudo nano /etc/security/limits.d/audio.conf

...
@audio - rtprio 80
@audio - memlock unlimited
...
The Raspbian version of Jessie Lite has CPU throttles, or governors, set to conserve power and reduce heat from the CPU. By default, they are set to “on demand”. That means the voltage to the CPU is reduced until general use hits 90% of CPU capacity. Then it triggers a voltage (and speed) increase to handle the load. I change that to “performance” so that it has as much horsepower available.
Note that it gets set for all four cores, since the Raspberry Pi is multi-core. For more info about governors and even overclocking, this is a good resource.
Virtual memory also needs to get downgraded so there is little swap activity. Zynaddsubfx is power hungry but doesn’t use much memory, so it doesn’t need VM.
sudo /sbin/sysctl -w vm.swappiness=10
Now, to set up the audio interface. For my ZynAddSubFX box, I use an IQaudio Pi-DAC+. I’ve also used a standard USB audio interface and have instructions for that in my post about the Pi Zero. Raspbian uses Device Tree overlays to load I2C, I2S, and SPI interface modules. So, instead of separate drivers to install, I just edit config.txt to include the appropriate modules for the Pi-DAC+. Note that I also disabled the crappy built-in audio by commenting out “dtparam=audio=on”. This helps later on when setting the default audio device used by the system.
For Jack to grab hold of the Pi-DAC+ for output, the default user (pi) needs a DBus security policy for the audio device.
sudo nano /etc/dbus-1/system.conf

...
<!-- Only systemd, which runs as root, may report activation failures. -->
<policy user="root">
<allow send_destination="org.freedesktop.DBus"
    send_interface="org.freedesktop.systemd1.Activator"/>
</policy>
<policy user="pi">
    <allow own="org.freedesktop.ReserveDevice1.Audio0"/>
</policy>
...
Next, ALSA gets a default configuration for which sound device to use. Since I disabled the built-in audio earlier, the Pi-DAC+ is now “0” in the device stack.
sudo nano /etc/asound.conf

pcm.!default {
 type hw card 0
 }
ctl.!default {
 type hw card 0
 }

sudo reboot
Software installation
ZynAddSubFX has thick dependency requirements, so I collected the installers in a bash script. Most of it was lifted from the Zynthian repo. Download the script from my Github repo to install the required packages and run it. The script also includes rtirq-init, which can improve performance on USB audio devices and give ALSA some room to breath.
Now the real meat of it all gets cooked. There are some issues with build optimizations for SSE and Neon (incompatible with ARM processors), so you’ll need to disable those in the cmake configuration.
git clone https://github.com/zynaddsubfx/zynaddsubfx.git
cd zynaddsubfx
mkdir build
cd build
cmake ..
ccmake .
[remove SSE parameters and NoNeonplease=ON]
sudo make install
Usually takes 20-40 minutes to compile. Now to test it out and get some basic command line options listed.
zynaddsubfx -h
Usage: zynaddsubfx [OPTION]
-h , –help Display command-line help and exit -v , –version Display version and exit -l file, –load=FILE Loads a .xmz file -L file, –load-instrument=FILE Loads a .xiz file -r SR, –sample-rate=SR Set the sample rate SR -b BS, –buffer-size=SR Set the buffer size (granularity) -o OS, –oscil-size=OS Set the ADsynth oscil. size -S , –swap Swap Left <–> Right -U , –no-gui Run ZynAddSubFX without user interface -N , –named Postfix IO Name when possible -a , –auto-connect AutoConnect when using JACK -A , –auto-save=INTERVAL Automatically save at interval (disabled with 0 interval) -p , –pid-in-client-name Append PID to (JACK) client name -P , –preferred-port Preferred OSC Port -O , –output Set Output Engine -I , –input Set Input Engine -e , –exec-after-init Run post-initialization script -d , –dump-oscdoc=FILE Dump oscdoc xml to file -u , –ui-title=TITLE Extend UI Window Titles
The web app
I also built a simple web app to switch instruments from a mobile device (or any browser, really). It runs on Node.js and leverages Express, Socket.io, OSC, and Jquery Mobile.
First, a specific version of Node is needed and I use NVM to grab it. The script below installs NVM.
curl https://raw.githubusercontent.com/creationix/nvm/master/install.sh | sh
Logout and log back in to have NVM available to you.
nvm install v6.10.1
My Node app is in its own repo. The dependencies Express, Socket.io, and OSC will be installed with npm from the included package.json file.
Test the app from the ZynAddSubFX-WebApp directory:
node index.js
On a phone/tablet (or any browser) on the same wifi network, go to:
http://<IP address of the Raspberry Pi>:7000
You should see a list of instruments to choose from. It won’t do anything yet, but getting the list to come up is a sign of initial success.
Now, for a little secret sauce. The launch script I use is from achingly long hours of trial and error. The Raspberry Pi is a very capable machine but has limitations. The command line parameters I use come from the best balance of performance and fidelity I could find. If ZynAddSubFX gets rebuilt with better multimedia processor optimizations for ARM, this could change. I’ve read that improvements are in the works. Also, this runs Zynaddsubfx without Jack and just uses ALSA. I was able to get close to RTprio with the installation of rtirq-init.
#!/bin/bashexport DBUS_SESSION_BUS_ADDRESS=unix:path=/run/dbus/system_bus_socketif pgrep zynaddsubfx
then
echo Zynaddsubfx is already singing
exit 0
else
zynaddsubfx -U -A=0 -o 512 -r 96000 -b 512 -I alsa -O alsa -P 7777 -L "/usr/local/share/zynaddsubfx/banks/Choir and Voice/0034-Slow Morph_Choir.xiz" &
sleep 4 if pgrep zynaddsubfx
then
echo Zyn is singing
else
echo Zyn blorked. Epic Fail.
fi
fimini=$(aconnect -o | grep "MINILAB")
mpk=$(aconnect -o | grep "MPKmini2")
mio=$(aconnect -o | grep "mio")if [[ $mini ]]
then
aconnect 'Arturia MINILAB':0 'ZynAddSubFX':0
echo Connected to MINIlab
elif [[ $mpk ]]
then
aconnect 'MPKmini2':0 'ZynAddSubFX':0
echo Connected to MPKmini
elif [[ $mio ]]
then
aconnect 'mio':0 'ZynAddSubFX':0
echo Connected to Mio
else
echo No known midi devices available. Try aconnect -l
fiexit 0
I have 3 MIDI controllers I use for these things and this script is set to check for any of them, in order of priority, and connect them with ZynAddSubFX. Also, I have a few “sleep” statements in there that I’d like to remove when I find a way of including graceful fallback and error reporting from a bash script. For now, this works fine.
I add this line to rc.local to launch Zynaddsubfx automatically on boot and connect MIDI.
su pi -c '/home/pi/zynlaunch.sh >> /tmp/zynaddsubfx.log 2>&1 &'
Unfortunately, Node won’t launch the web app from rc.local, so I add some conditionals to /home/pi/.profile to launch the app after the boot sequence.
if pgrep zynaddsubfx
then
echo Zynaddsubfx is singing
fiif pgrep node
then
echo Zyn app is up
else
node /home/pi/ZynAddSubFX-WebApp/index.js
fi
Making music
This ended up being a pad and drone instrument in my tool chest. ZynAddSubFX is really an amazing piece of software and can do much more than I’m setting up here. The sounds are complex and sonically rich. The GUI version lets you change or create instruments with a deep and precise set of graphic panels.
For my purposes, though, I want something to play live with that has very low resource needs. This little box does just that.